How to Add a Caption to Images in Google Slides (2024 Guide)
In this article, we will show you how to add captions to images in Google Slides. Simply follow the steps below!
How to Add Captions to Images in Google Slides
Google Slides does not have a built-in function for adding captions directly to images. However, you can add text boxes beneath the images manually to create captions. Simply follow the steps below:
1. Add a Text Box for the Caption
Go to the menu and click on “Insert”. Select “Text box”.

Click and drag to draw a text box below or next to the image where you want the caption to appear. Here’s an example:

2. Enter the Caption
Click inside the text box and type your caption. Make it concise and relevant to the image.

You can highlight the text to format it. Use the toolbar at the top to change the font, size, color, and alignment to match your slide’s design.

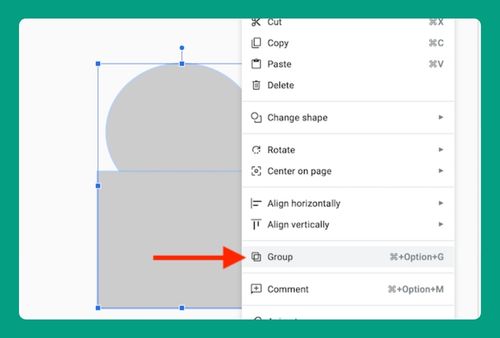
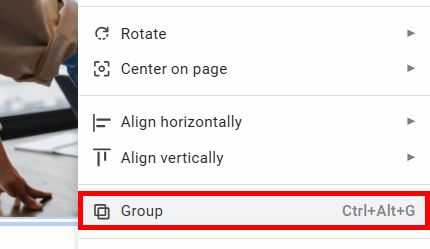
3. Group the Image and Caption Together
Click on the image to select it. Hold down the Shift key and click on the text box to select both elements. Right-click on the selected items and choose “Group”. Alternatively, you can use the keyboard shortcut Ctrl + Alt + G (Windows) or Command + Option + G (Mac).
4. Adjust the Position and Alignment of the Grouped Image and Caption
Click and drag the grouped image and caption to position them as needed on the slide. If you need to resize, click on the group and use the blue handles to adjust the size proportionally.

We hope that you now have a better understanding of how to add captions to images in Google Slides. If you enjoyed this article, you might also like our article on how to remove the background of an image in Google Slides and how to crop an image into a shape in Google Slides.