How to Remove Audio From Google Slides (Easiest Way in 2024)
In this article, we will show you how to remove audio from Google Slides. Simply follow the steps below.
Remove Audio From Google Slides
To remove audio from Google Slides, we will use an example presentation titled ‘High School End of the Year Memory Book,’ where the title slide contains an audio clip. Follow the steps below:
1. Navigate to the Slide Containing Audio
In the left-hand sidebar, scroll through the slides to find the one with the audio you want to remove. Click on this slide to make it the active slide displayed in the main editing window.
In our example, the audio is on the title slide.

2. Click on the Audio Icon on the Slide
Look at the active slide for the audio icon, which typically looks like a speaker or music note. Click directly on the audio icon to select it. This will highlight the icon, indicating it is selected and ready for editing.

3. Delete the Audio File from the Slide
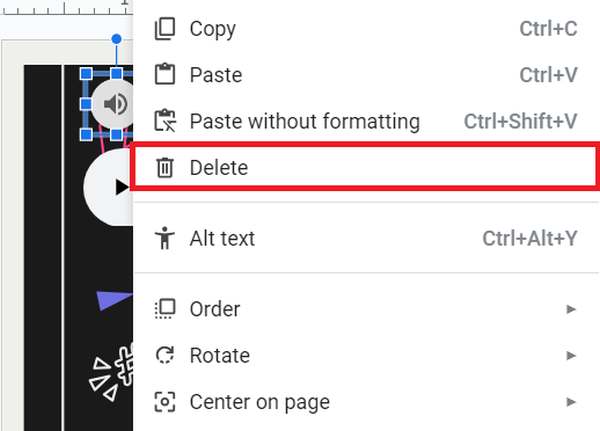
With the audio icon selected, press the ‘Delete’ key on your keyboard to remove it. If you prefer, you can also right-click on the audio icon and choose ‘Delete’ from the context menu that appears. This action will remove the audio file from the slide.
4. Confirm the Audio Has Been Removed
After deleting the audio icon, visually check the slide to ensure the icon is no longer present.

To double-check, play the presentation by clicking the ‘Slideshow’ button located in the top-right corner of the Google Slides interface. This action will confirm that the audio is indeed removed and no longer plays.

We hope that you now have a better understanding of how to remove audio from Google Slides. If you enjoyed this article, you might also like our article on how to record a slideshow with audio Google Slides or our article on how to trim audio in Google Slides.

