How to Trim Audio in Google Slides (Easiest Way in 2024)
In this article, we will show you how to trim audio in Google Slides. Simply follow the steps below.
Trim Audio in Google Slides
To trim audio in Google Slides, we will use an example presentation titled “Annual School Sports Day.” Follow the steps below.
1. Open an External Software
Open an external application like Audacity or use an online service such as AudioTrimmer.com. In our example, we will use the Audacity application.
2. Upload Your Audio File
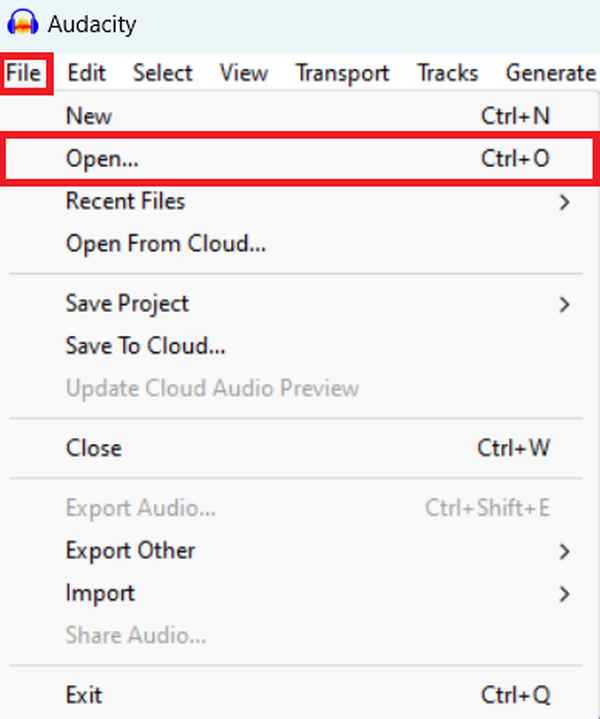
To upload your audio file, click the ‘File’ menu at the top left and select ‘Open.’ Then, navigate to the file you wish to edit.
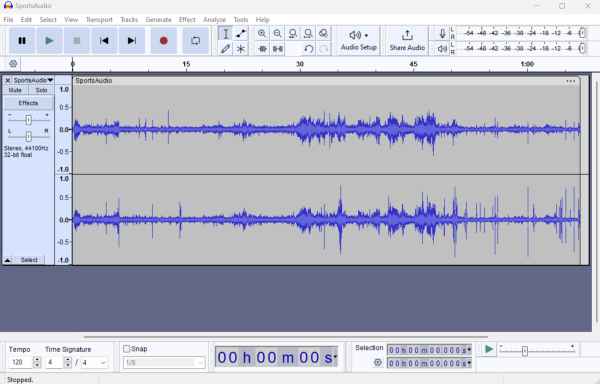
Once uploaded, your audio will be displayed as a waveform on the screen.
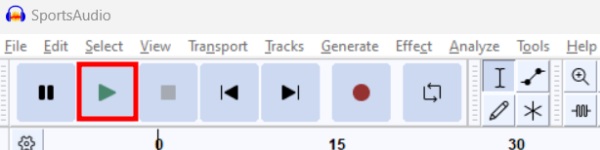
3. Select the Parts to Trim
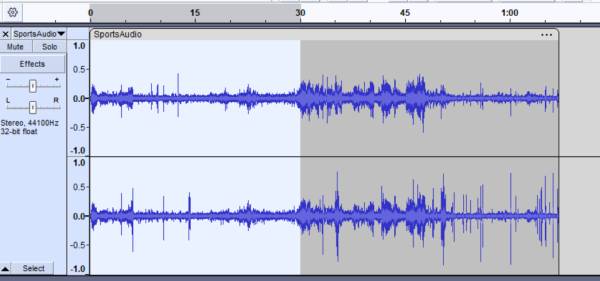
Play the audio track to identify the sections you want to trim out. Use the ‘Selection Tool’ to highlight the parts of the audio waveform you want to delete.

For example, we want to trim the first 30 seconds of the audio.
4. Trim Unwanted Audio Sections
Once you have made your selection, press the ‘Delete’ key on your keyboard to remove the unwanted parts of the audio. This action will only keep the highlighted sections that are essential for your presentation.

After trimming, you can play back the edited audio to ensure it aligns perfectly with the segments of your presentation. To do this, click the ‘Play’ button located at the top of the Audacity window.
5. Save the Edited Audio as a New File
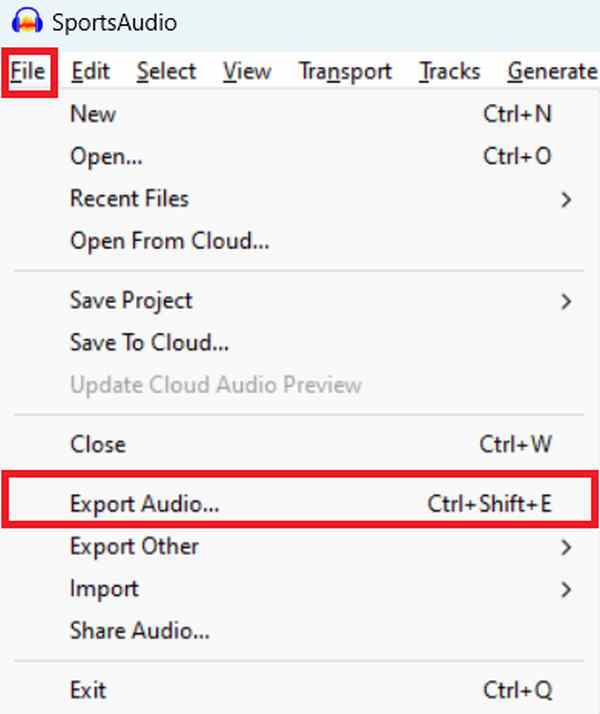
After confirming that the audio edits meet your expectations, save the trimmed audio as a new file to preserve the original. In Audacity, go to the ‘File’ menu, and then select ‘Export Audio.’
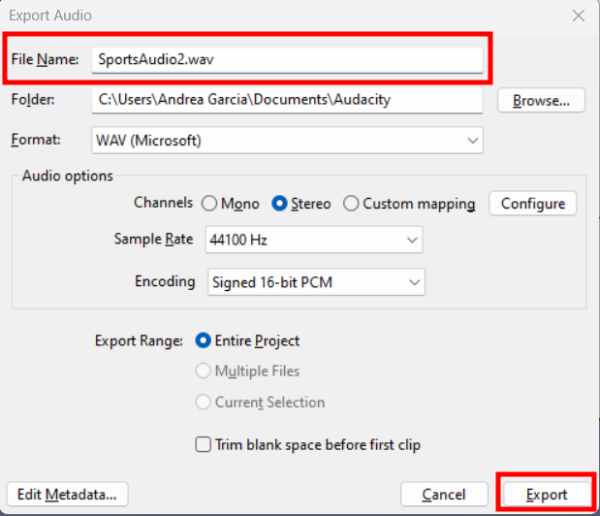
Name your file appropriately and choose a location on your computer to save it. This ensures you have a dedicated version of the audio specifically tailored for your presentation. Once you’re finished, click ‘Export’ to save the audio file.
6. Upload the New Audio File to Google Drive
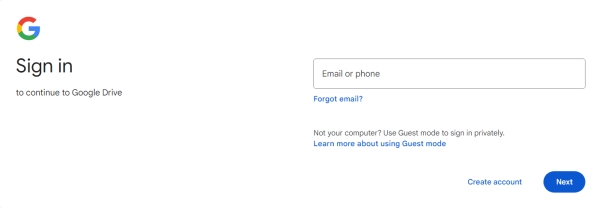
To use your edited audio in Google Slides, you first need to upload it to Google Drive. Open your web browser, go to Google Drive, and sign in if necessary.
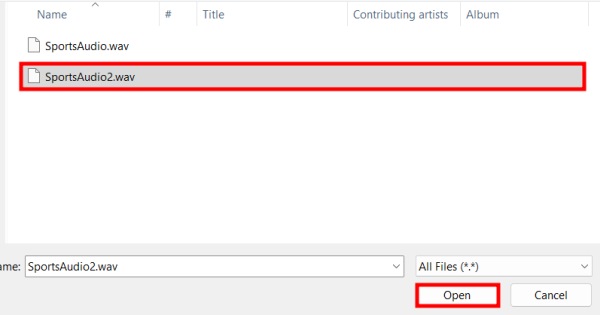
Once in Google Drive, click on the ‘New’ button on the top left side of the tab, select ‘File upload,’ and then navigate to where your audio file is saved on your computer.
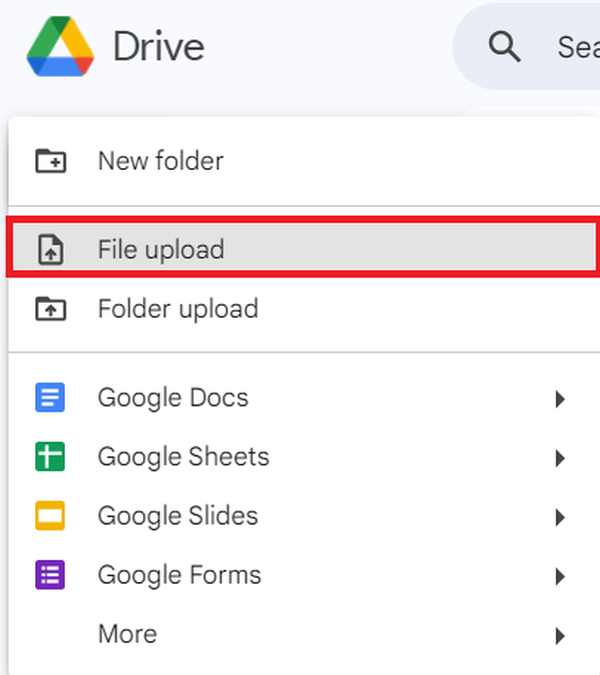
Select the file and click ‘Open’ to upload it to Google Drive. This step is essential for integrating your audio seamlessly into your Google Slides presentation.
7. Upload the Trimmed Audio to Your Google Slides Presentation
Back in Google Slides, delete the old audio file from your slide by selecting it and pressing the delete key in your keyboard.

Then, click on “Insert” in the top menu, select “Audio,” and upload the trimmed audio file from your computer.
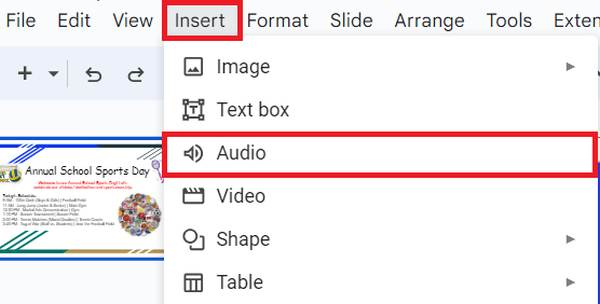
Position it as needed on the slide. For example, we will position the audio icon in the lower right corner of the slide to keep it unobtrusive yet accessible.

We hope that you now have a better understanding of how to trim audio in Google Slides. If you enjoyed this article, you might also like our article on how to remove an audio file from Google Slides or our article on how to embed a link in Google Slides.