Add Border to an Image in Google Slides (Easiest Way in 2025)
In this article, we will learn how to put a border around an image in Google Slides using the border options from the toolbar. Simply follow the steps below.
Add Border to Image in Google Slides
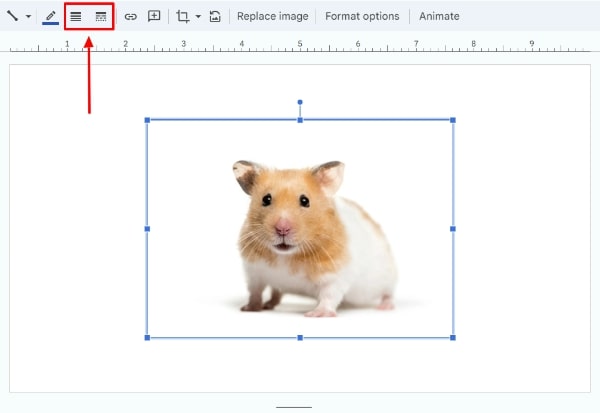
Follow the steps below to add a border to an image in Google Slides using the border options. For this example, we will use an image of a hamster with a white background to make it stand out in the slide.
1. Upload and Insert Your Image
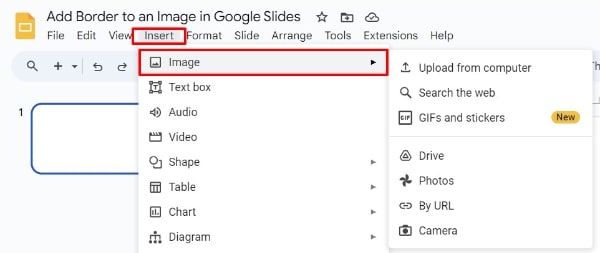
Click on the slide where you wish to add your image. Then click on Insert in the top menu and decide how you want to upload your image (e.g., from your computer, via a direct link, or from Google Drive). Upload or select the image of the hamster.
2. Adjust the Position and Size of the Image
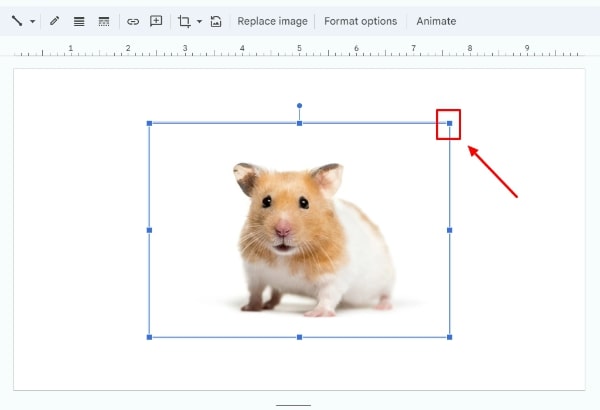
Click on the image to activate it. You will see handles appear around the edges of the image. Click and drag these handles to resize the image as desired without distorting its proportions. You can also use the corner handles to maintain the aspect ratio. Then click and drag the image to position it where you want it on the slide.
3. Add a Border
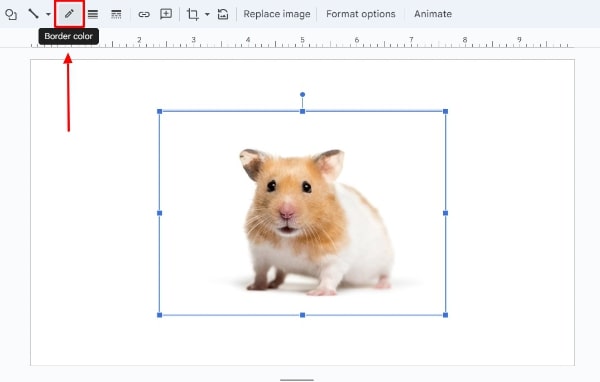
Click on the image to ensure it is selected and look at the toolbar above the slide. You’ll find the Border color tool represented by a pencil and a color drop.
4. Select a Border Color
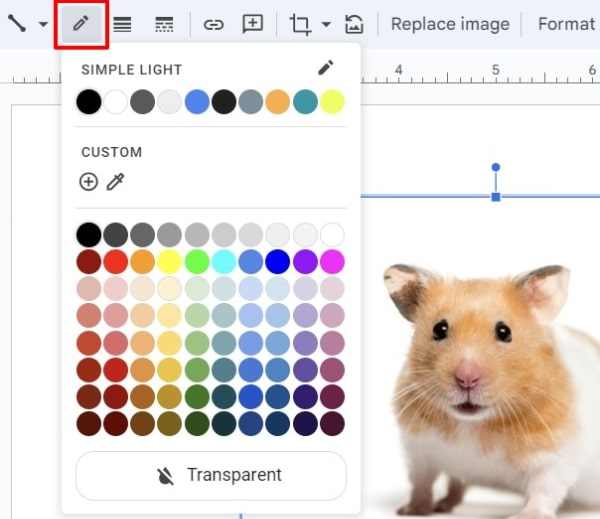
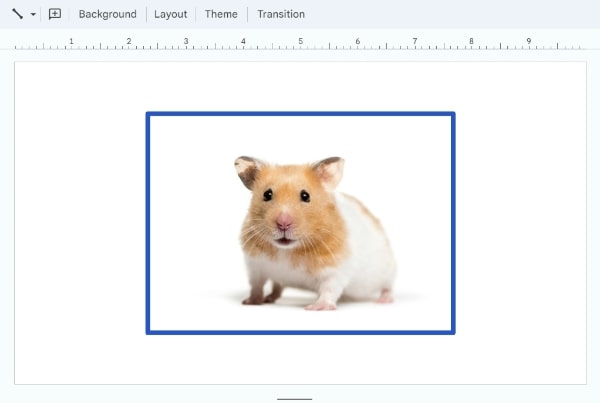
Click on the Border color tool to open a color palette. Select a suitable color for the border that contrasts well with both the image of the hamster and the slide background. For this example, we will choose a blue border.
5. Adjust the Border Thickness and Style (optional)
Still in the border options, you can adjust the thickness of the border by selecting Border weight. Choose from various thicknesses like 1px, 3px, 6px, etc. If desired, change the style of the border (solid, dotted, dashed) by clicking on Border dash.
6. Finalize and Review Your Image
Click outside the image to deselect it and evaluate the border’s appearance. If the border needs tweaking, reselect the image and modify the border settings.
We hope that you now have a better understanding of how to add a border to an image in Google Slides. If you enjoyed this article, you might also like our article on to how to put an image behind text in Google Slides and how to add a link to an image in Google Slides.