How to Blur an Image in Google Slides (Easiest Way in 2024)
In this tutorial, we will show you exactly how to blur an image in Google Slides. Simply follow the steps below.

How to Blur an Image on Google Slides
Currently, Google Slides doesn’t have a built-in blur feature. You would need to blur the image using another tool and then upload it to Google Slides.
However, you can try to blur an image in Google Slides by making see-through duplicates of the image. Here’s how:
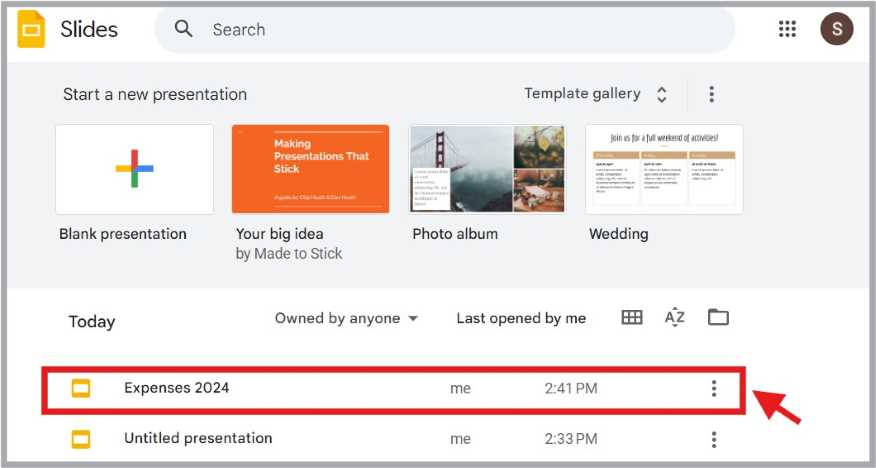
1. Open Your Google Slides Presentation With the Image You Want to Blur
Open Google Slides. Click on the presentation with the image you want to blur. In our example, we use “Expenses 2024.”
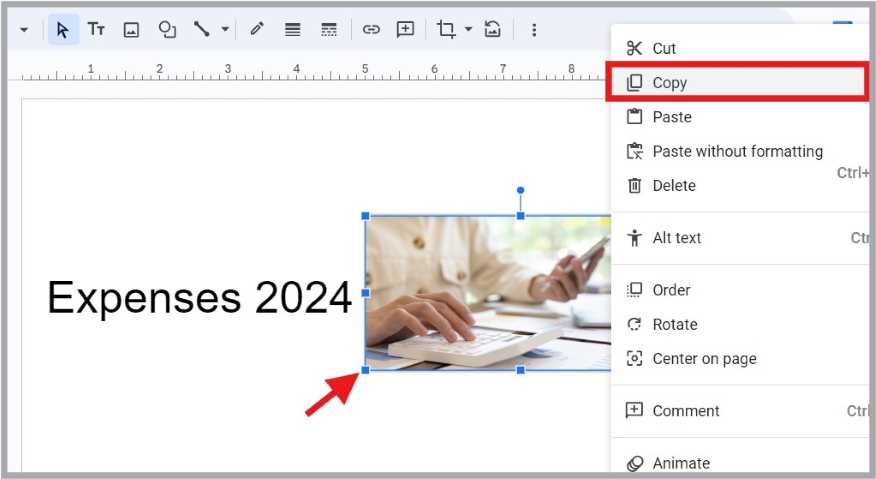
2. Create a Duplicate of the Image
Right-click on the image and select “Copy.”
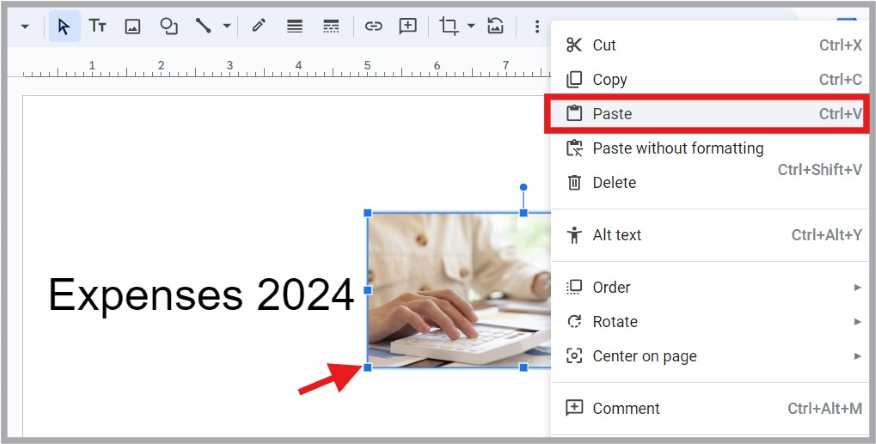
Right-click again and choose “Paste.” This will create a duplicate of your image.
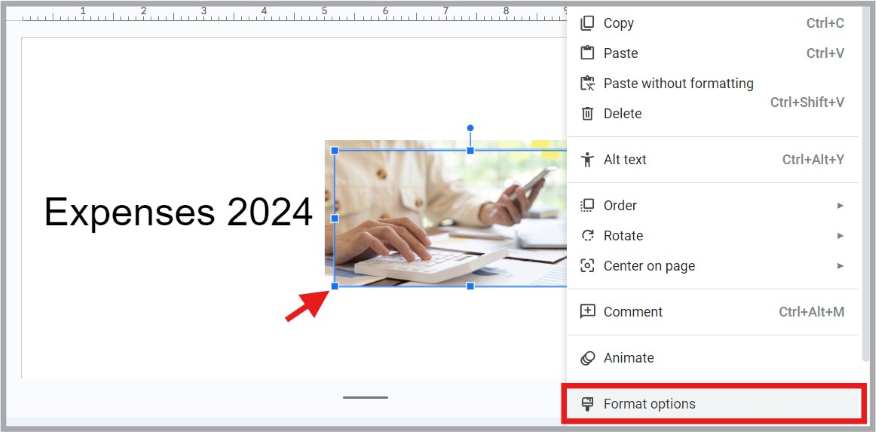
3. Adjust the “Opacity” of the Duplicate Image
Right-click on the duplicate image and select “Format Options.” The “Format Options” box will appear on the right
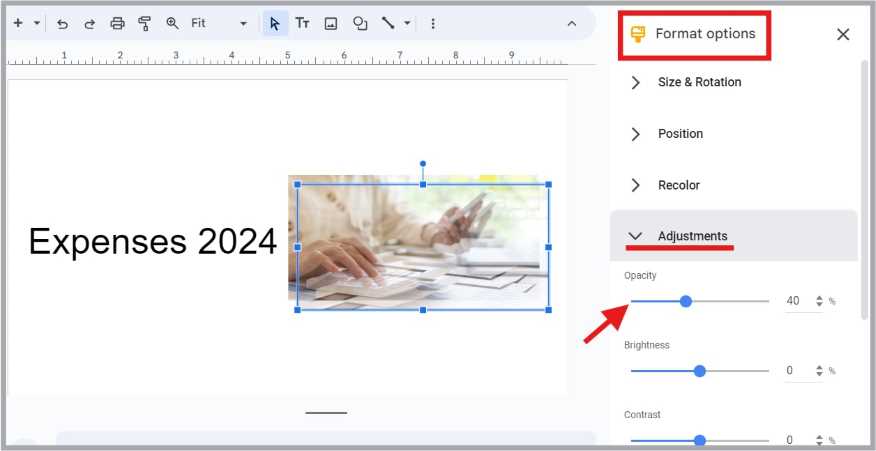
Go to “Adjustments.” Slide the “Opacity” bar to the left to make the image more see-through. We suggest setting the opacity to 40%.
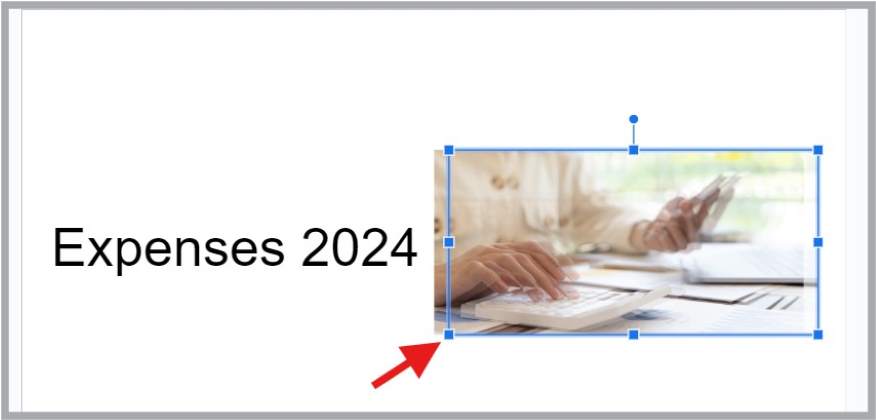
4. Position the Transparent Image Over the Original Image
Drag the duplicate image. Place it on top of the original image but not completely lined up. This creates a blurred effect.
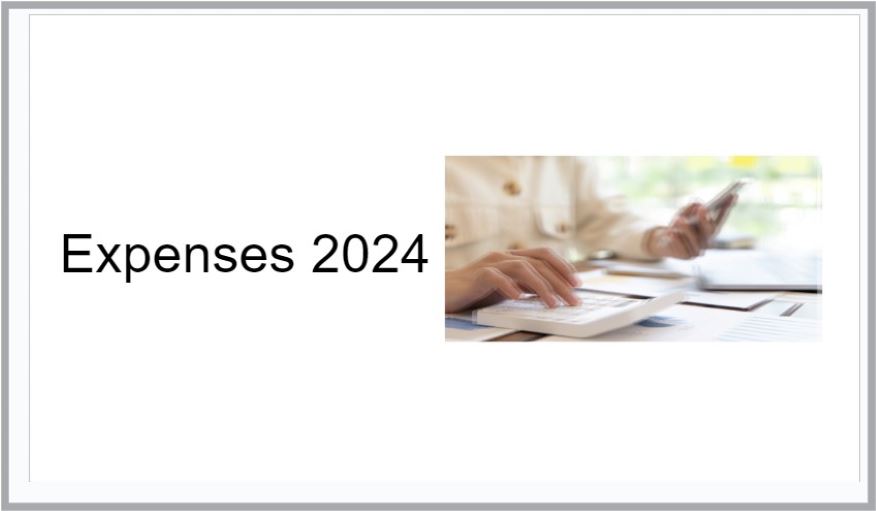
5. “Copy” and “Paste” the Duplicate a Few Times to Make the Image Blurrier
To get the right blur level, “Copy” and “Paste” the duplicate a few times to make the image blurrier. Each time you do this, drag the pasted duplicate on top of the original image but not completely lined up. In our example, we did this three times. Check to see if the image looks right to you.
We hope you now know how to blur an image in Google Slides. If you enjoyed this article, you might also enjoy our articles on how to flip an image on Google Slides and how to export images from Google Slides.