How to Make Two Columns in Google Slides (Easiest Way in 2024)
In this article, we will show you exactly how to make two columns in Google Slides in just a few simple steps. Simply follow the steps below.

Make Two Columns in Google Slides
Follow the steps below to create two columns in Google Slides.
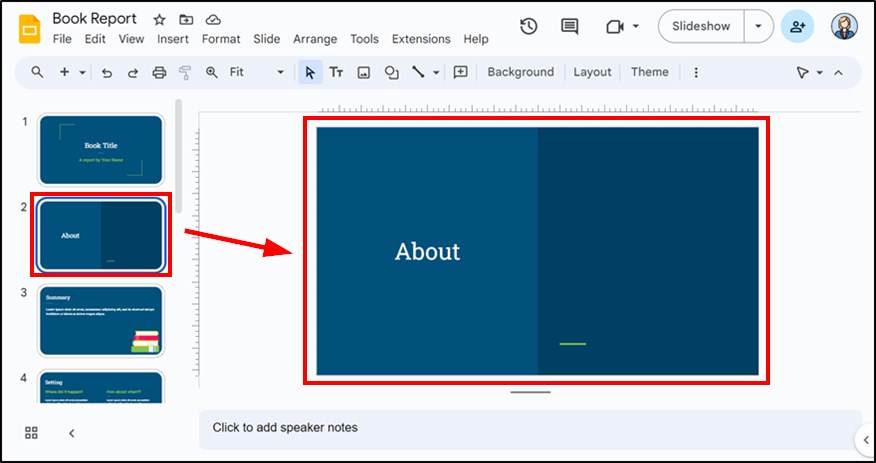
1. Select the Desired Slide to Add Two Columns
Choose the slide in your Google Slides presentation where you want to create two columns. This lets you make changes directly to that specific slide.
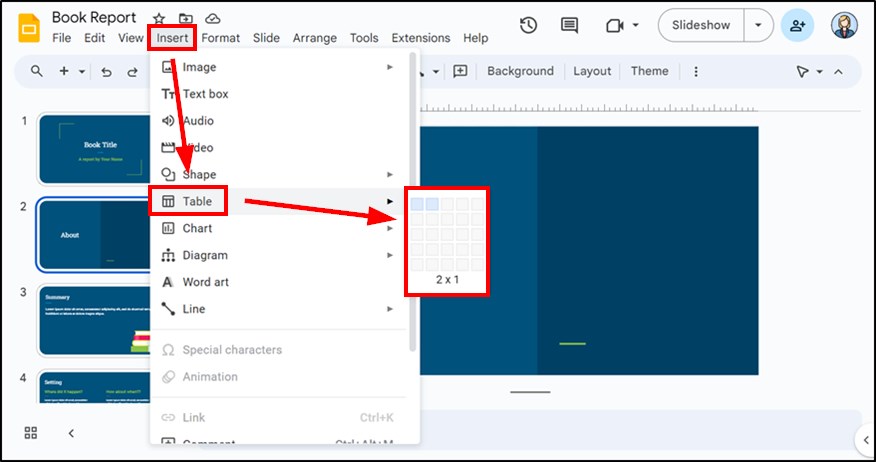
2. Insert a New Table for Two Columns
Click on the “Insert” menu, then select “Table.” Choose a 2 x 1 table to create two columns. The table cells will serve as your columns for the content.
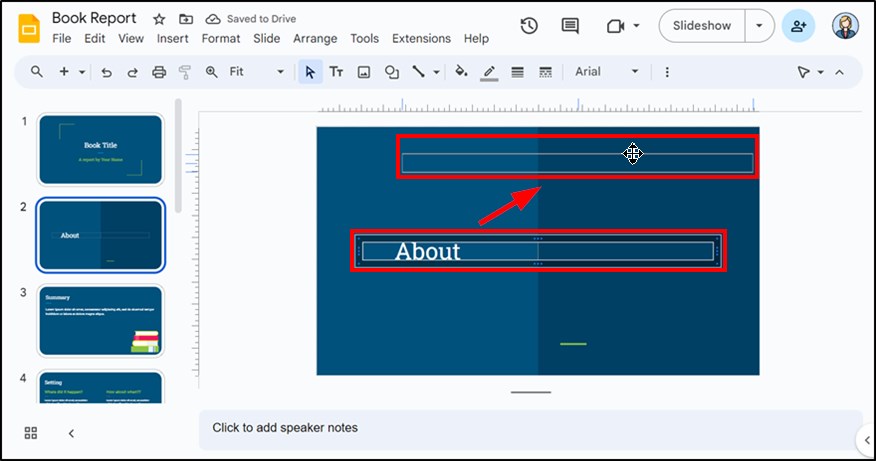
3. Adjust the Widths of the Columns as Needed
Click and drag the borders of the table cells to adjust the widths. You can make one column wider or narrower, depending on your content needs.
4. Type or Paste Your Content into the Table Cells
Click inside each table cell and type or paste the content you want to display in two columns. Use text, bullet points, or other information relevant to your slide. Keep your content concise to fit well within the columns.
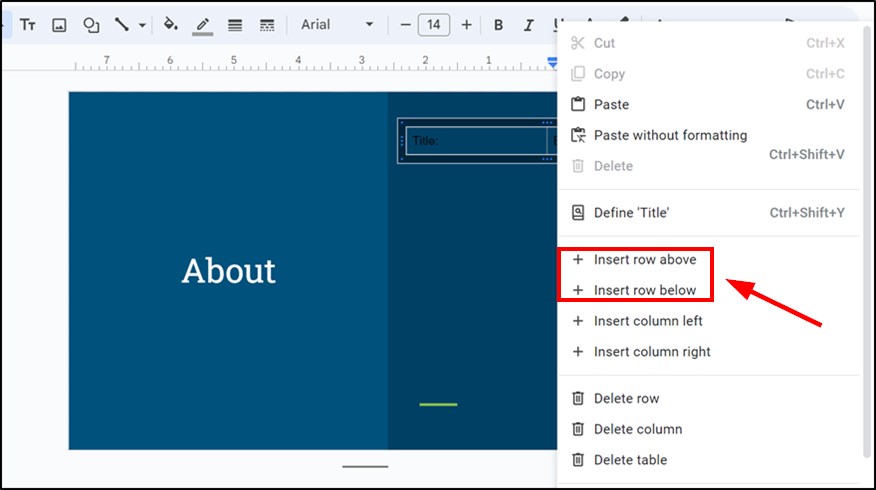
5. Add a New Row if Needed
To add a new row, right-click inside the table. Select “Insert row above” or “Insert row below” from the context menu. This will create another row with two columns for additional content.
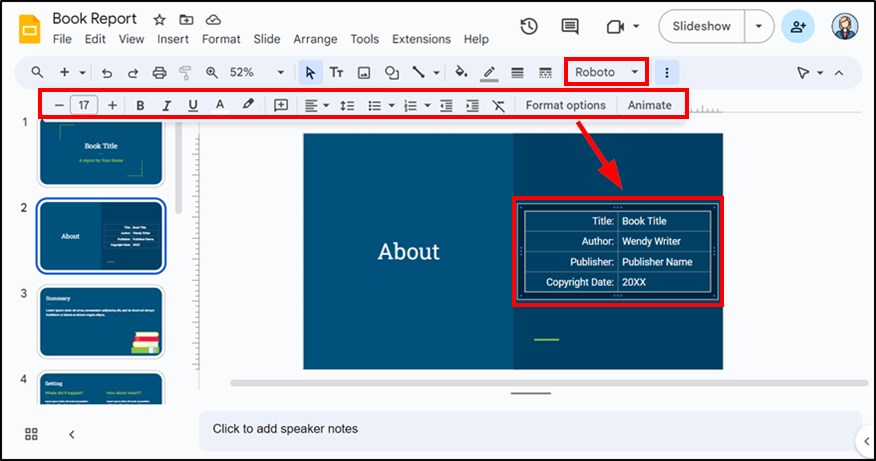
6. Style the Text in Your Columns for Better Presentation
Select the text in each cell to enhance the appearance of your columns. Use the toolbar options to change the font, size, color, or alignment. Make your text visually appealing to capture the audience’s attention.
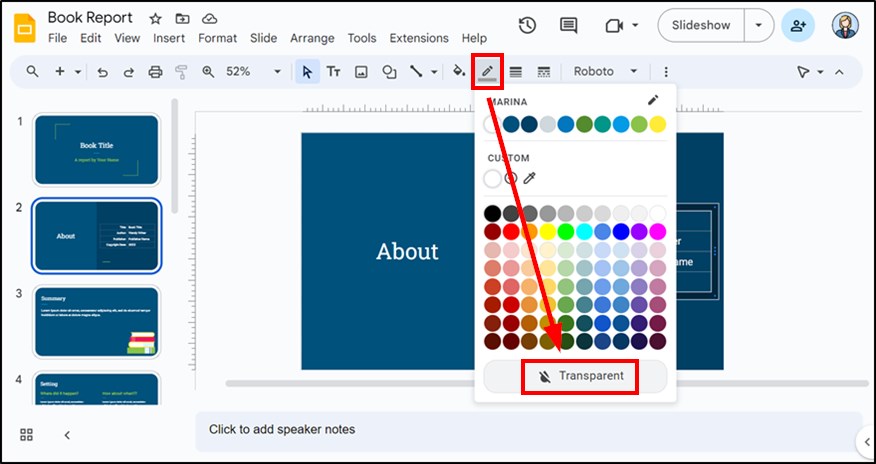
7. Remove Table Borders (Optional)
If you prefer not to see the table borders, click on the table. Then, click on the pencil icon in the toolbar. Change the border color to “Transparent.” This will remove the visible lines while keeping the text in columns.
8. Confirm Your Changes Are Saved in Google Slides
Google Slides automatically saves your changes. Check for the “Saved to Drive” message at the top. Ensure all your content appears correctly in the two columns before presenting.

We hope that you now have a better understanding of how to create two columns in Google Slides. If you enjoyed this article, you might also like our articles on how to make a slide vertical in Google Slides and how to make columns in Google Slides.