How to Add a Watermark in Google Slides (Easiest Way in 2024)
In this tutorial, we will show you exactly how to make a watermark in Google Slides. Simply follow the steps below.

How to Add a Watermark to Google Slides
Follow the steps below to make a watermark in Google Slides.
1. Select the Slide Where You Want the Watermark
With your Google Slides presentation already open, navigate to the slide where you want to add the watermark.

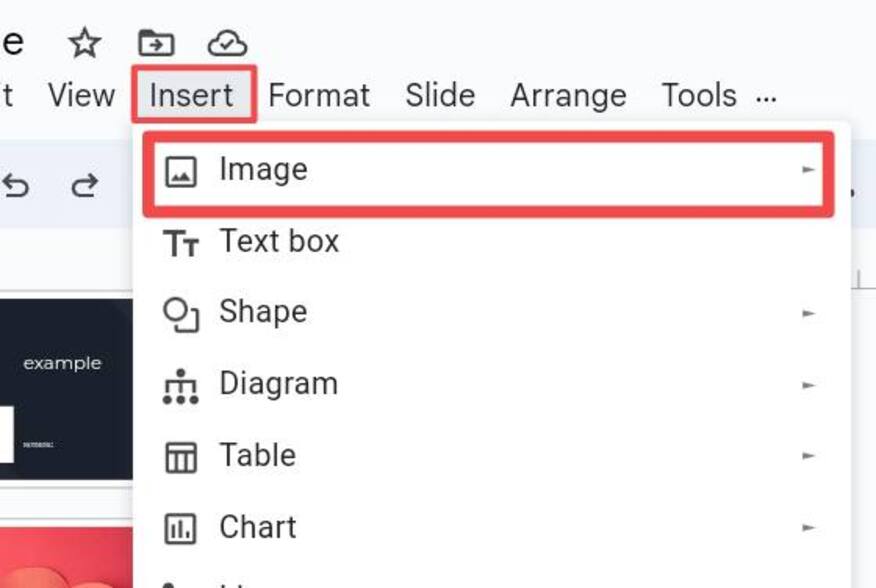
2. Insert a Text Box or Upload an Image
Decide if you want a text or image watermark. For text, go to “Insert” and select “Image.”
3. Adjust the Transparency of the Watermark
After inserting the image, select “Format options” in the toolbar. Under the “Adjustments” section, reduce the “Opacity” until it blends into the background but is still visible. For example, setting opacity to 50% creates a soft watermark effect.
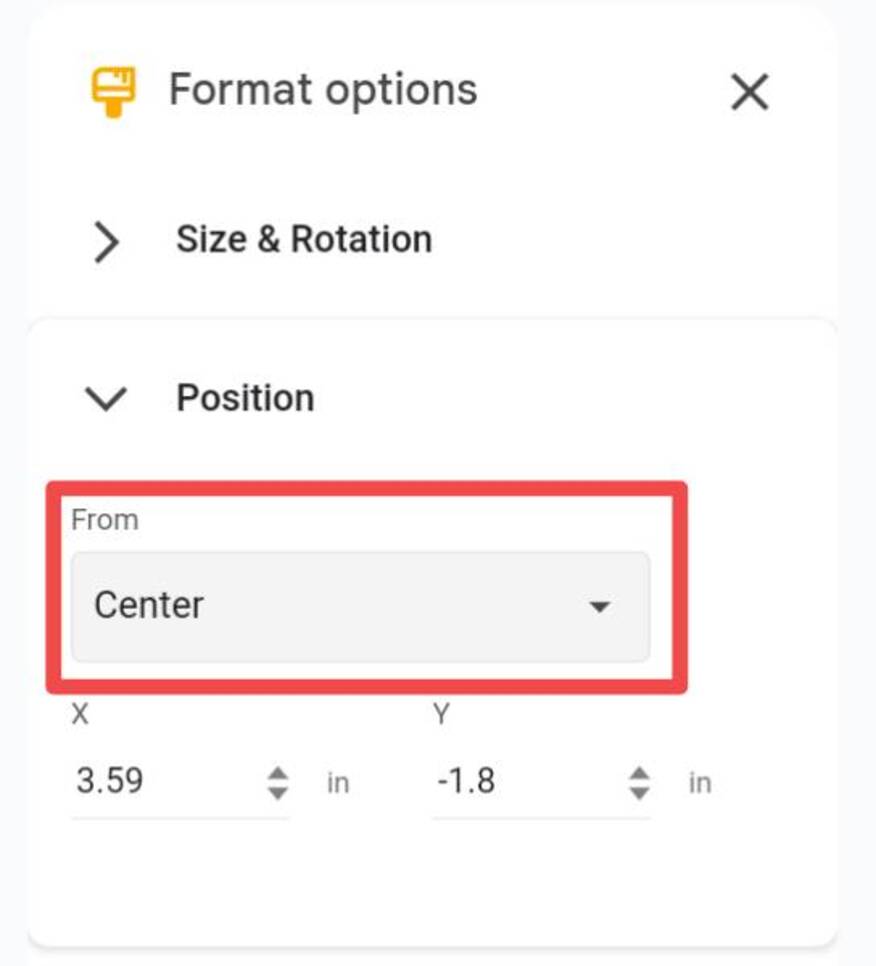
4. Move the Watermark to the Right Spot
Position your watermark where you want it to appear on the slide. Common placements include the bottom-right corner or the center of the slide.
We hope you now know how to add a watermark in Google Slides. If you enjoyed this article, you might also enjoy the following articles: