How to Make Columns in Google Slides (Easiest Way in 2024)
In this article, we will show you exactly how to make columns in Google Slides in just a few simple steps. Simply follow the steps below.

Make Columns in Google Slides
Google Slides doesn’t offer a built-in option for columns, but you can create them by placing text boxes side by side or using a table to organize content.
Follow the steps below to add columns in Google Slides in 6 simple steps.
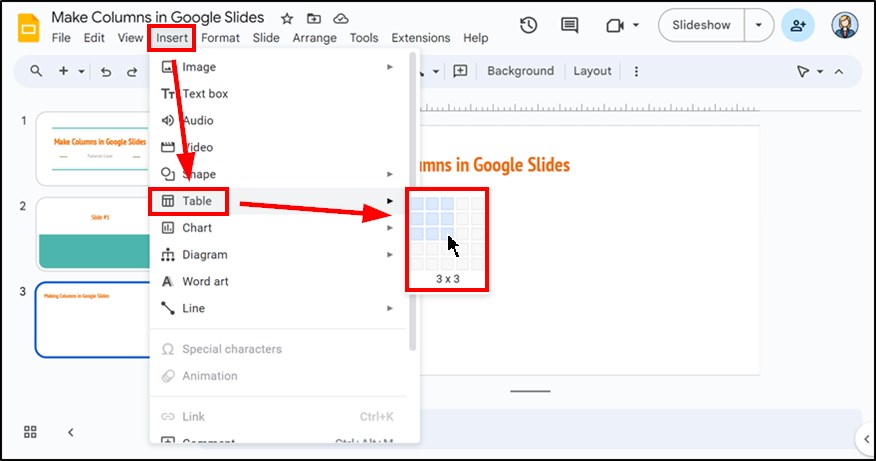
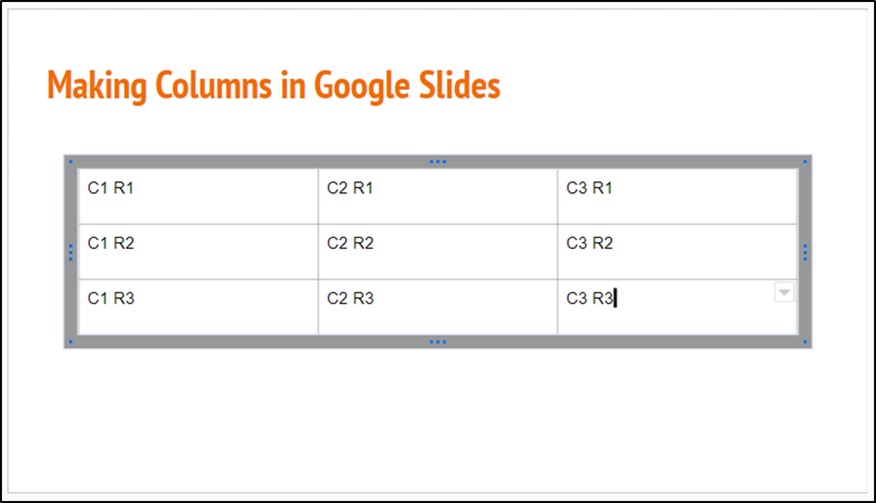
1. Insert a Table from the Insert Menu
Click on the “Insert” menu at the top of the screen. Select “Table” and then choose how many columns you want to create. This action places a table on your slide, which you will use to organize your content into columns.
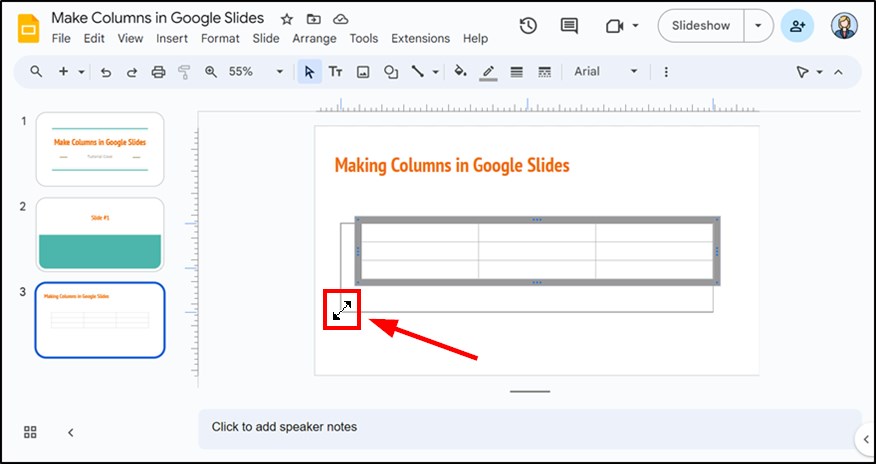
2. Resize the Table for Your Slide
Click and drag the edges of the table to adjust its size. Make sure the table fits well within the slide area so it looks organized and professional.
3. Enter Content in Each Column Cell
Click inside each cell of the table to type your text. This step allows you to fill each column with relevant information, ensuring that your content is clearly presented.
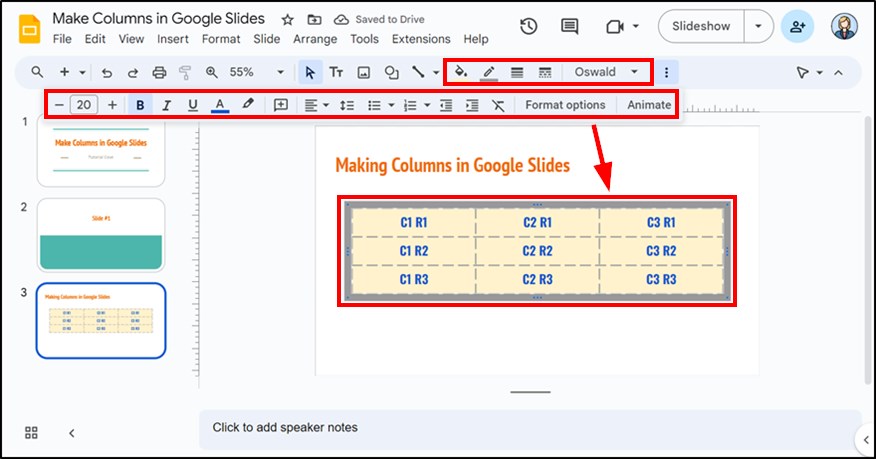
4. Format the Table for Better Appearance
Use the formatting tools in the toolbar to modify the font size, style, and colors. This enhances the visual appeal of your columns and makes the text easier to read.
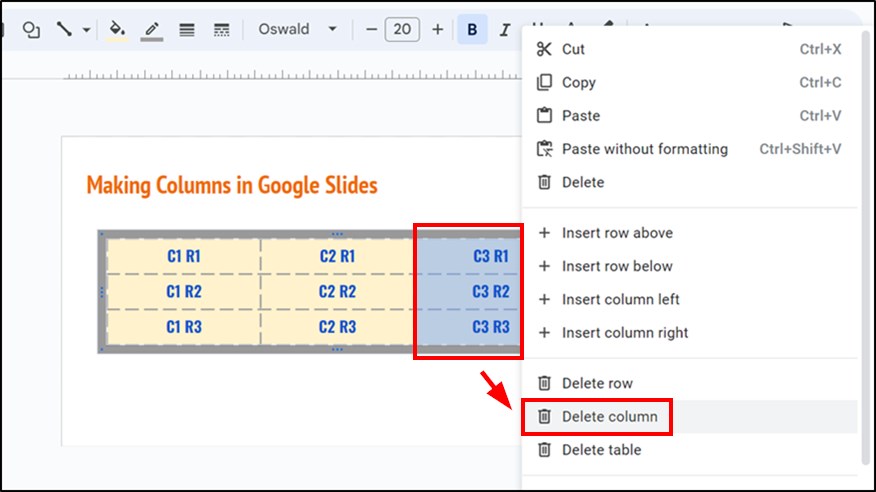
5. Remove a Column from the Table (Optional)
If you need to remove a column, right-click on the header of the column you want to delete. Select “Delete column” from the menu. This step is optional, depending on your design needs.
We hope that you now have a better understanding of how to add columns on Google Slides. If you enjoyed this article, you might also like our articles on how to create two columns in Google Slides and how to check the edit history on Google Slides.