Crop Image to Circle in Google Slides (How to Do it in 2024)
In this article, we will show you how to crop an image to a circle using crop shape options. Simply follow the steps below.
Crop Image to Circle in Google Slides Using Crop Shape Options
Follow the steps below to crop an image to a circle using the Shapes feature under the Crop Tool.
1. Add Your Image
Go to the slide where you want to insert your image. Click on Insert in the top menu then choose Image from the drop-down menu. You can upload an image from your computer, search the web, drive, photos, by URL, or from your camera.
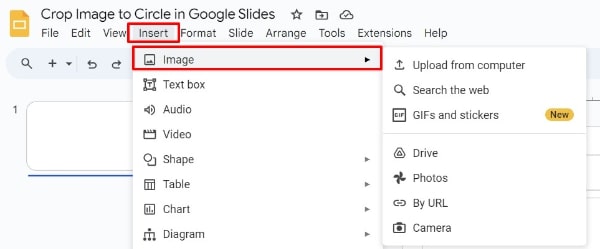
For this example, we will use an image of a crow-tit.
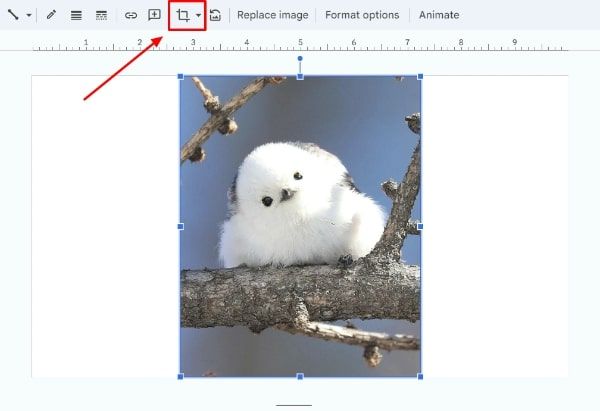
2. Activate Crop Mode
Click on the image of the crow-tit and click on the Crop button that appears in the toolbar right above the slide. The Crop button looks like two overlapping right angles. This action will activate crop mode for the image.
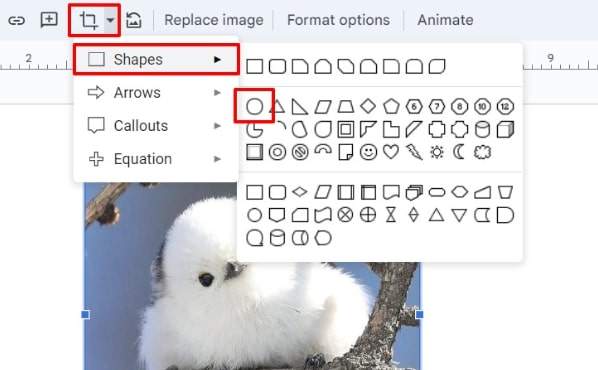
3. Change the Crop Shape
Click on the down-arrow next to the Crop button in the toolbar. This will open a drop-down menu. Choose Shapes and then select the Oval shape from the list of shapes available.
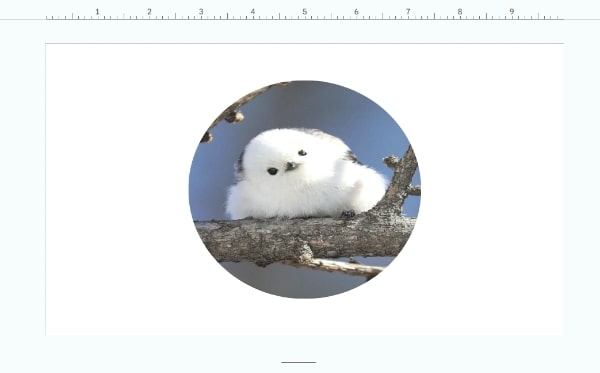
4. Adjust the Crop
After selecting the oval, the image will show default cropping using an oval shape. You may need to adjust the handles (small squares at the corners and midpoints of the bounding box) to ensure the oval covers the desired area of your image. To maintain a perfect circle, hold down the Shift key while dragging the handles.

5. Apply the Crop
Once you’re satisfied with how your image looks within the oval, click anywhere outside the image or press the Enter key to apply the crop.
6. Adjust and Style the Circular Image (optional)
If necessary, you can click on the cropped image to select it and use the bounding box handles to resize or reposition the image. You can also add a border by clicking the Border color button in the toolbar and selecting a color.
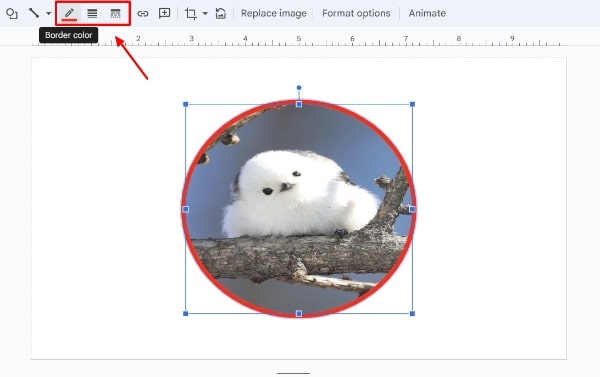
For this example, we added a red border around the image. Click on the buttons next to the Border color button to adjust the border weight and style.
We hope that you now have a better understanding of how to crop an image to a circle in Google Slides. If you enjoyed this article, you might also like our article on how to crop images in Google Slides and how to wrap text around an image in Google Slides.