How to Make and Format a Table in Google Slides (2024 Update)
In this article, we will show you exactly how to make and format a table in Google Slides in just a few simple steps. Simply follow the steps below.

How to Add a Table in Google Slides
Follow the steps below to make a table in Google Slides:
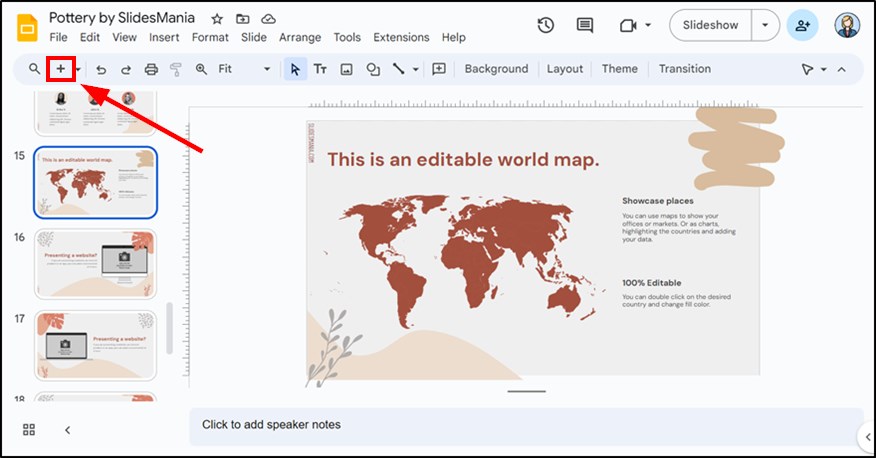
1. Insert a New Slide or Open the Slide Where You Want the Table
Before adding a table, insert a new slide by clicking the “+” icon at the top left or open the slide where you want to place the table.
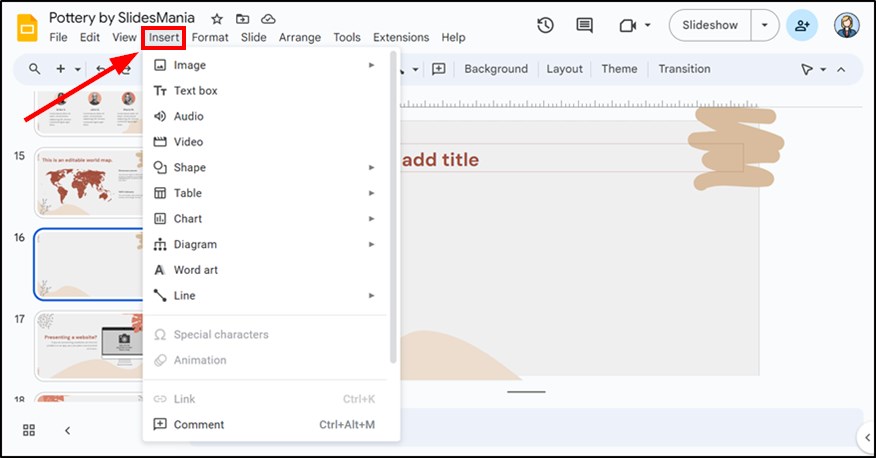
2. Open the “Insert” Menu to Begin Adding a Table
In Google Slides, use the “Insert” menu to start the process of adding a table.
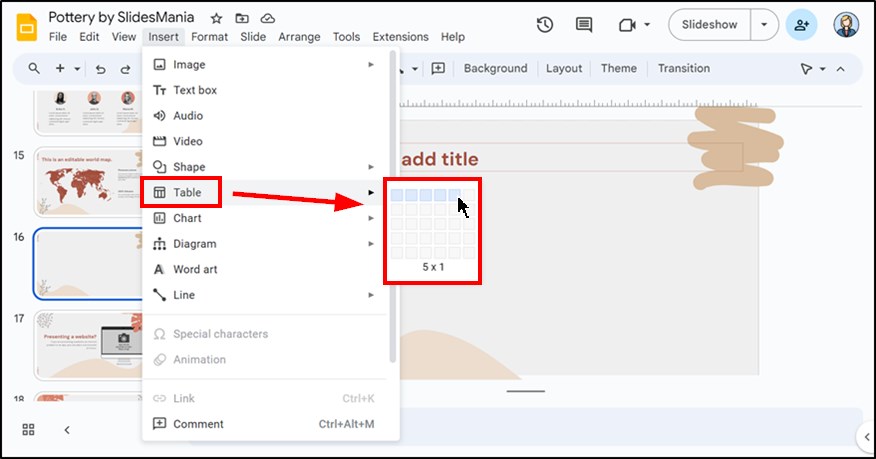
3. Select “Table” and Choose the Number of Rows and Columns
From the “Insert” menu, choose the “Table” option, then select the size of your table by dragging over the grid.
4. Position the Table on Your Slide
Once your table appears, click and drag it to move it to your desired position on the slide.
How to Edit a Table in Google Slides
Here’s how you can edit an existing table in Google Slides and customize its appearance to fit your needs:
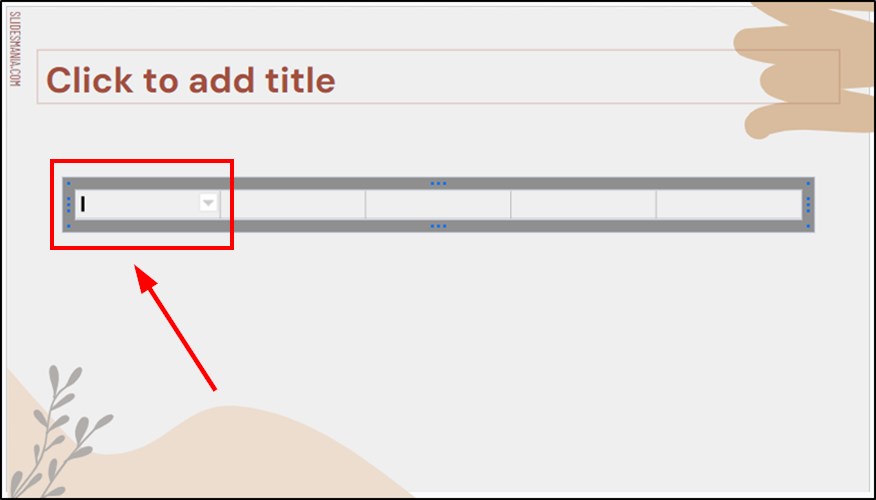
1. Click Inside a Table Cell to Start Editing
Select any cell in the table to begin entering or editing content.
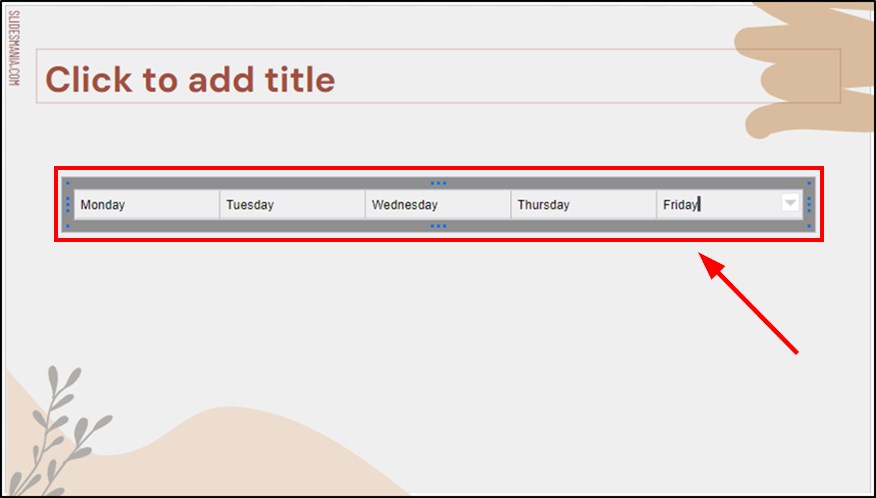
2. Type Data Directly into the Selected Cell
Enter text, numbers, or other content into the highlighted cell.
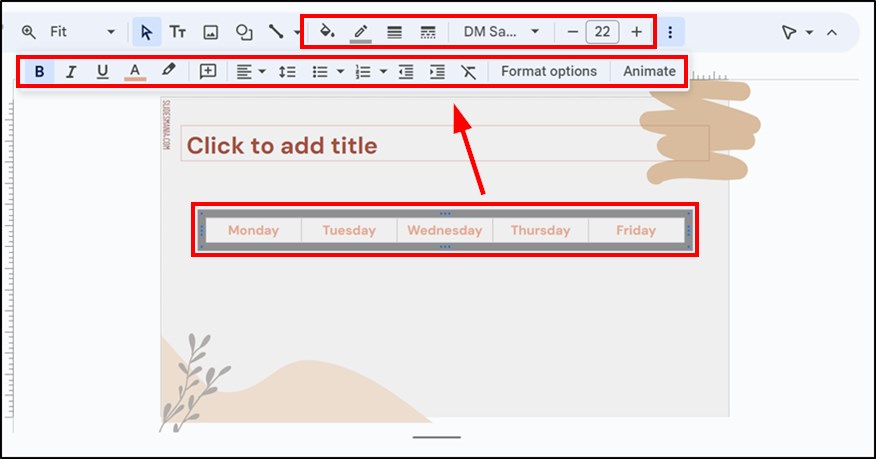
3. Use the Toolbar to Format Text in the Table
Format your text using the toolbar to adjust the font size, color, and alignment. You can also modify the table’s style by changing the border colors, line thickness, and background shading to match your presentation’s theme.
How to Add a Row to a Table in Google Slides
Follow these instructions to insert additional rows into your table:
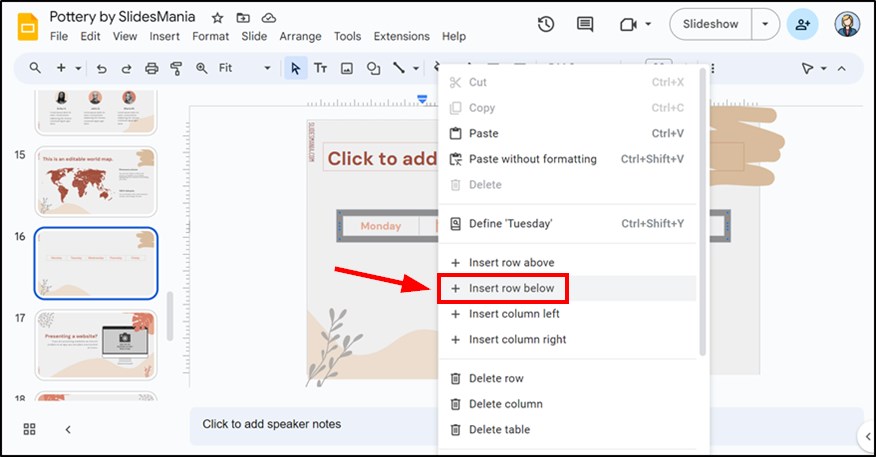
1. Right-Click a Table Cell to Add a Row
Right-click on any cell in the table where you want to insert a new row.
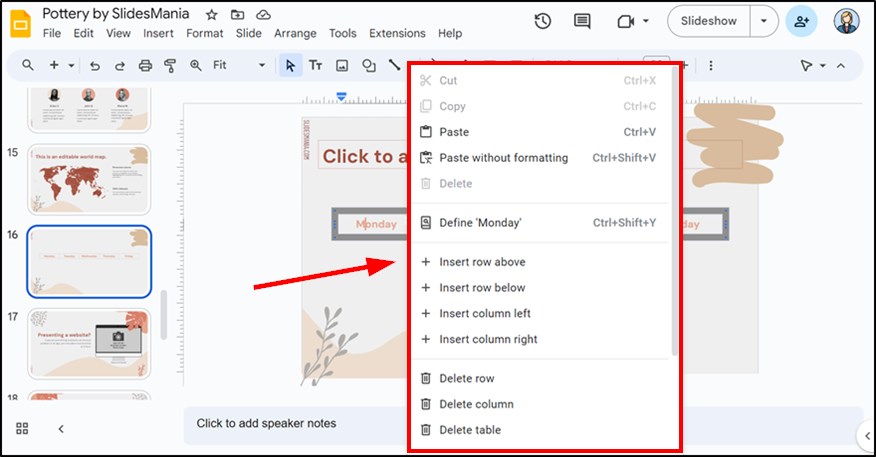
2. Choose to Insert a Row Above or Below the Selected Cell
Select “Insert row above” or “Insert row below” from the menu that appears.
How to Make a Table Smaller in Google Slides
You can make a table smaller in Google Slides. Here’s how:
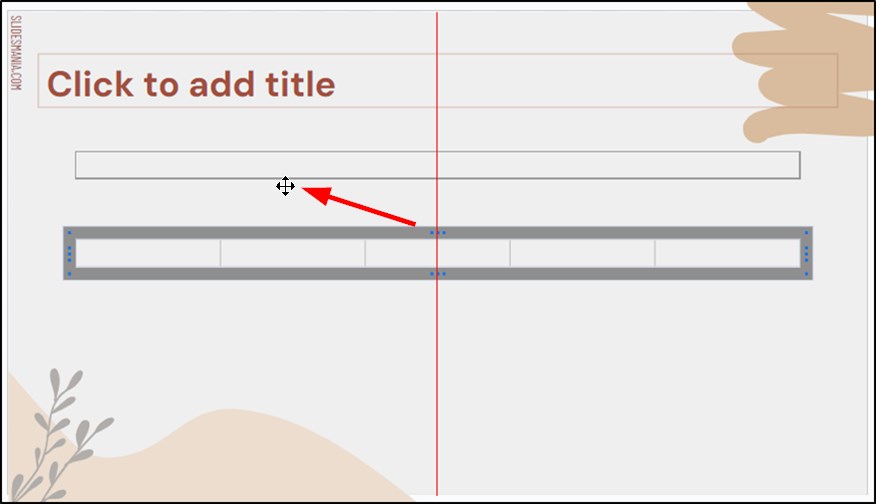
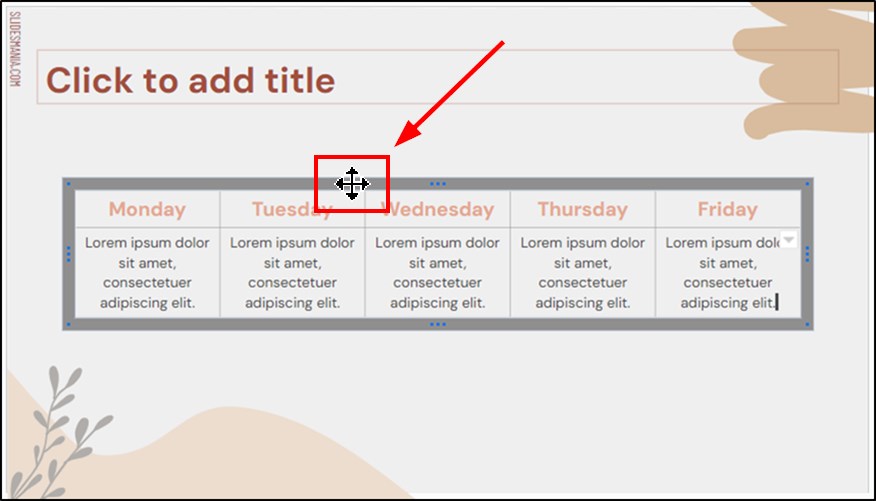
1. Click on the Table to Select It for Resizing
Select the entire table by clicking on it. Ensure that the cursor turns into a 4-headed arrow before clicking to properly select the entire table for resizing.
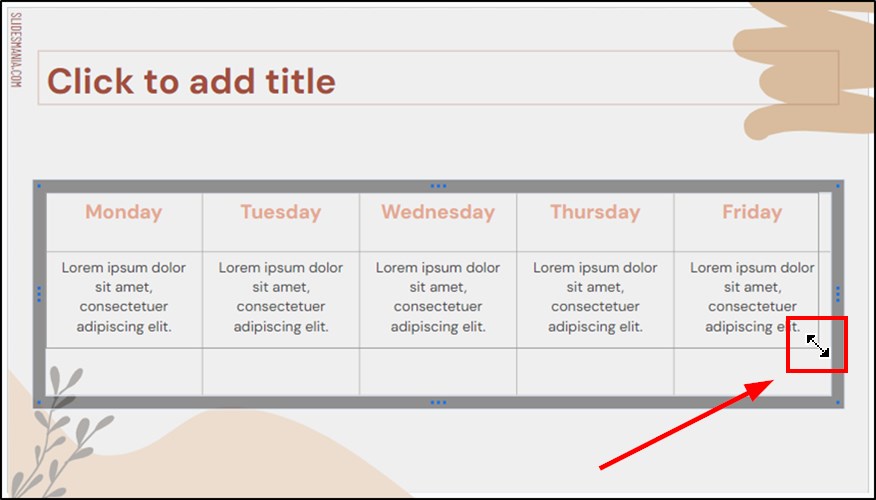
2. Drag the Table’s Corners or Edges to Make It Smaller
Once the table is selected, click and drag the corners or edges to resize the table to your preferred size.
Note: Although Google Slides saves your work automatically, you can confirm this by checking the “Saved to Drive” message at the top of the page. If you want to ensure your changes are saved, keep an eye out for that confirmation.
We hope that you now have a better understanding of how to create and format tables in Google Slides. If you enjoyed this article, you might also like our articles on how to create a table of contents in Google Slides and how to move multiple slides in Google Slides.