How to Make a Text Box Two Columns in Google Slides (2024)
In this tutorial, we will show you exactly how to make two columns in a text box in Google Slides in just a few simple steps. Read on to learn more.

Create Text Columns in Google Slides
Follow the steps below to make columns in a text box in Google Slides.
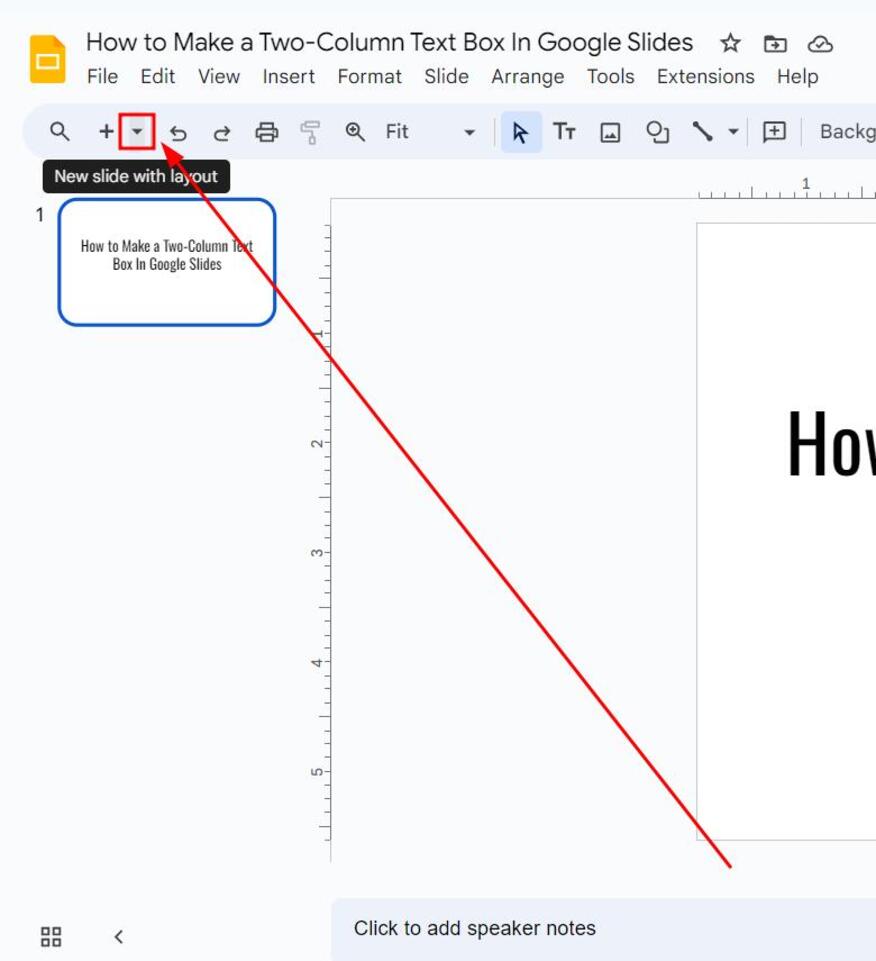
1. Create a New Slide With Layout by Clicking the “Dropdown” Arrow
Click on the small “dropdown” arrow beside the “+” icon in the toolbar to add a new slide.
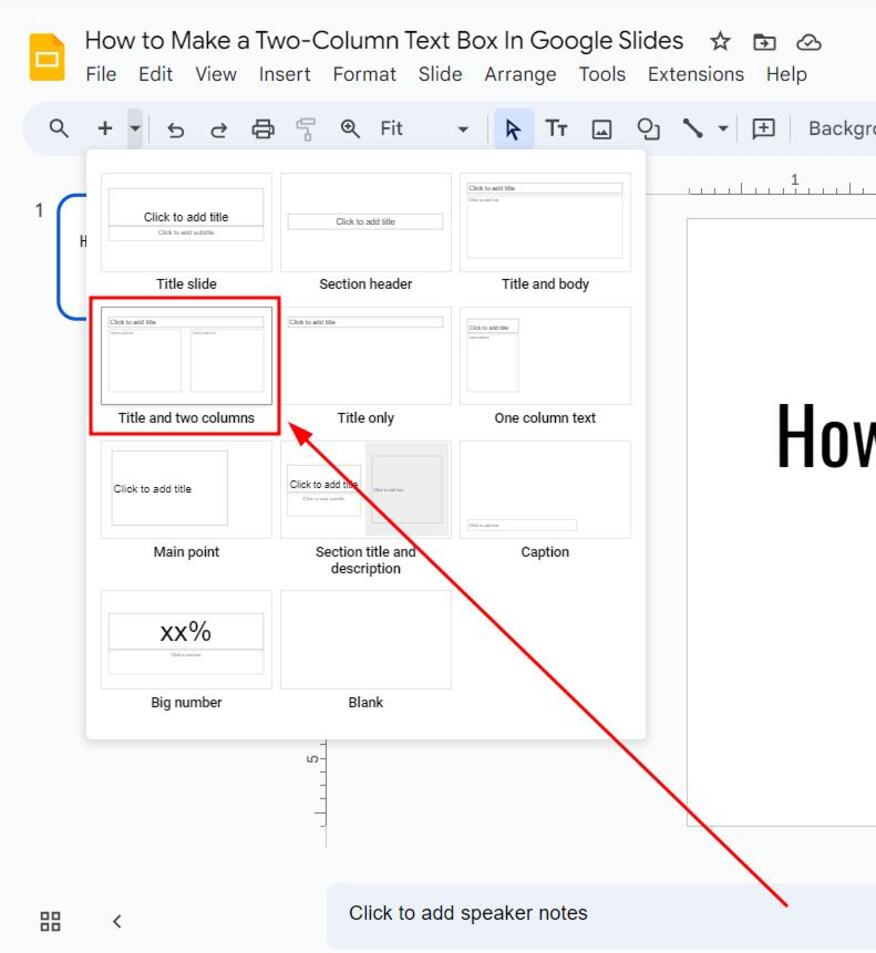
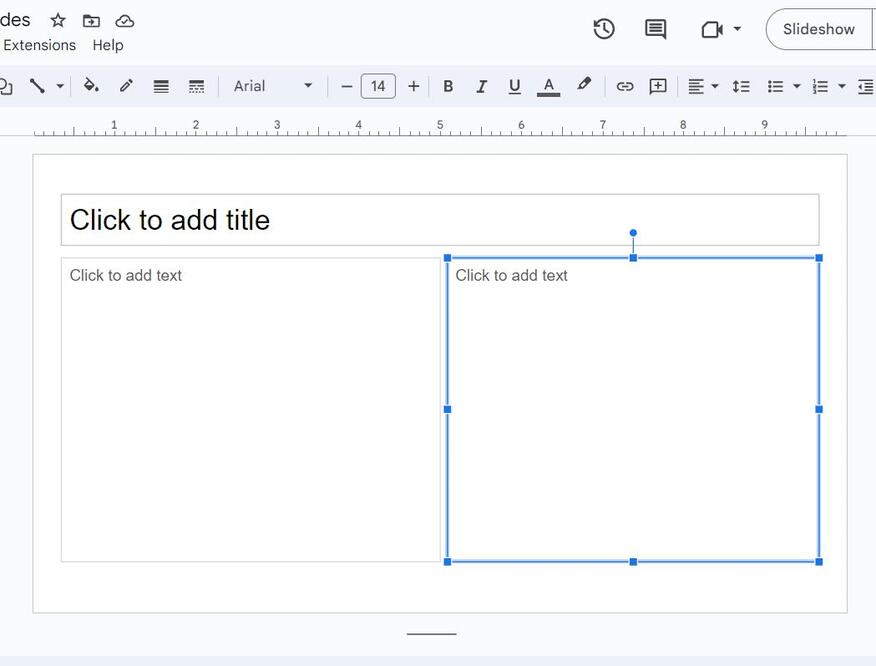
2. Select “Title and Two Columns” Layout
In the layout options, find and click “Title and Two Columns.”
3. Resize and Adjust the Text Boxes as Needed
Click and drag the edges of the text boxes to freely adjust them to your liking.
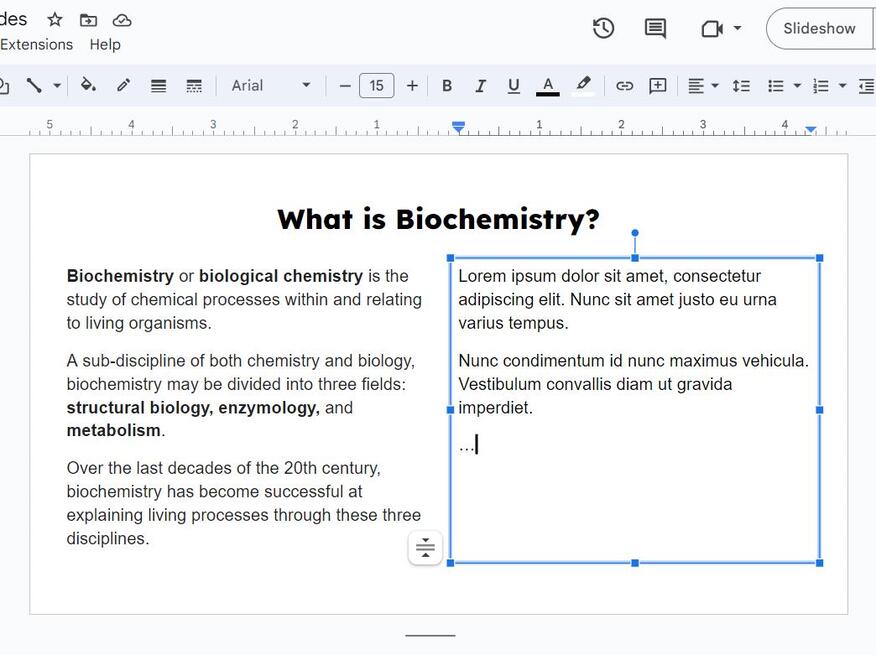
4. Enter Your Text in Each Column
Click inside the text boxes and start typing your content.
We hope that you now have a better understanding of how to split text into two columns in Google Slides. If you enjoyed this article, you might also like our articles on how to change the opacity of a text box in Google Slides and how to lock a text box in Google Slides.