How to Send a Shape to the Back in Google Slides (2024 Update)
In this article, we will show you how to send a shape to the back in Google Slides. Simply follow the steps below.
How to Move a Shape to the Back in Google Slides
To send a shape to the back in Google Slides, simply follow the steps below.
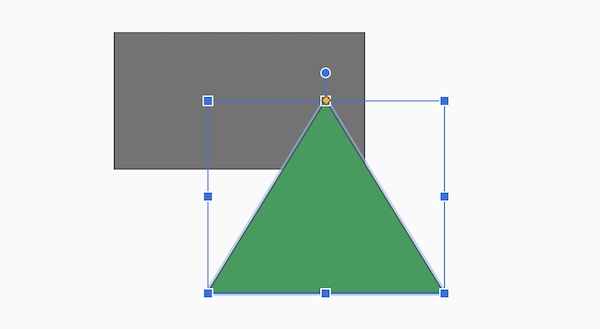
1. Select the Shape
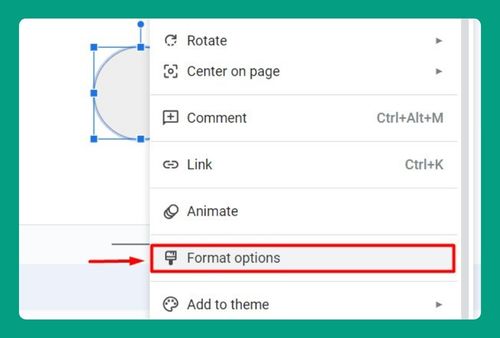
Click on the shape you want to send to the back. If your slide has multiple shapes, make sure you select the one that needs repositioning. This will activate the shape and show the formatting options.
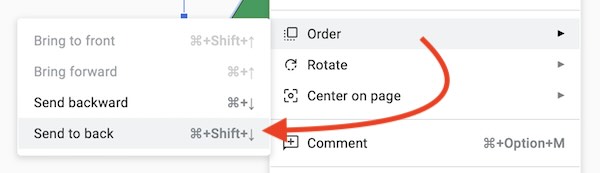
2. Send the Shape to the Back
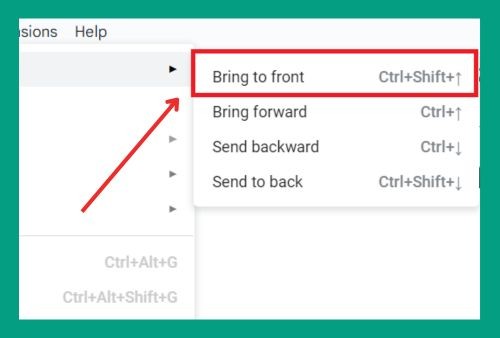
Right click on the image. In the “Order” submenu, select “Send to back.” This moves the selected shape behind all others on the slide.
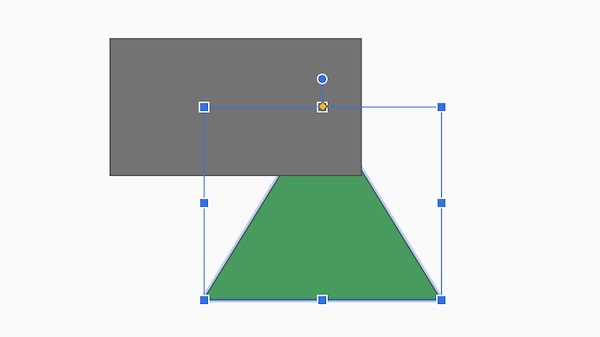
3. Adjust as Needed
After sending the shape to the back, click away from the shape to deselect it. Check the arrangement of the other elements on your slide. You can click on the shape again and repeat the process if it’s not yet in the correct position.
We hope you now have a better understanding of how to send a shape to the back in Google Slides. If you enjoyed this article, you might also like our article on how to fix error rendering shape Google Slides or our article on how to flip a shape in Google Slides.