How to Put a Picture in a Shape in Google Slides (2024 Update)
In this article, we will show you how to insert a picture into a shape in Google Slides. Simply follow the steps below.
How to Insert Picture Into a Shape in Google Slides
To insert a picture into a shape in Google Slides, simply follow the steps below.
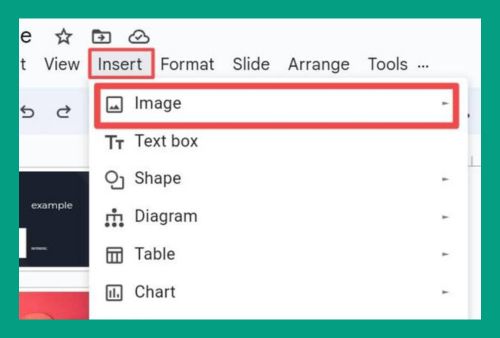
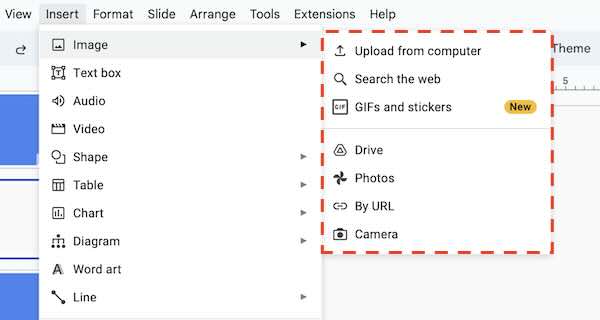
1. Insert an Image
Click on “Insert” in the toolbar and select “Image”. You can choose to upload a picture from your computer or select one from Google Drive or Google Images. Place the image on the slide where you want it within a shape.
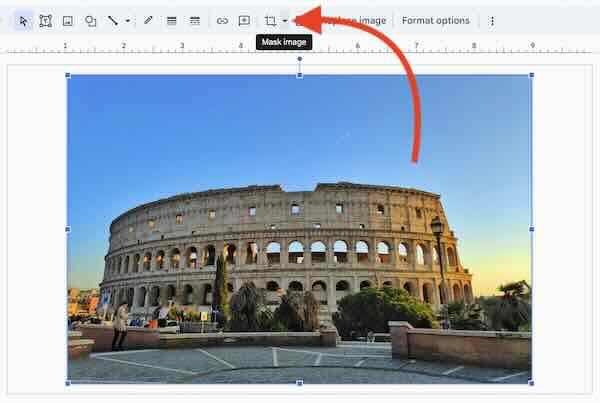
2. Crop Image to Shape
Select the image you just inserted. Click on the “Crop” button in the toolbar, then select “Mask image”.
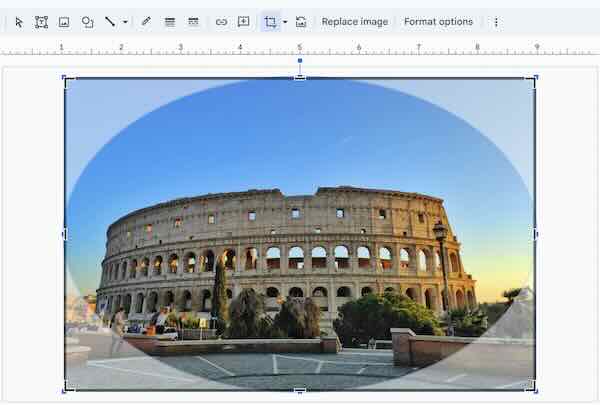
Choose the shape you want the image to fill. This will crop the image into that shape.

3. Adjust the Image within the Shape
Click on the image to select it. Adjust the positioning within the shape by clicking and dragging. Resize the image by pulling the blue corner handles if necessary to better fit the shape.

We hope you now have a better understanding of how to put a photo in a shape on Google Slides. If you enjoyed this article, you might also like our article on how to crop a shape in Google Slides or our article on how to duplicate a shape in Google Slides.