How to Move an Image to the Back in Google Slides (2025 Update)
In this article, we will show you exactly how to move an image to the back in Google Slides. Simply follow the steps below.
Move an Image to the Back in Google Slides
Follow the steps below to learn how to move images to the back in Google Slides.
1. Select the Image on the Slide
Click on the image you want to move to select it. The image will be highlighted, indicating that it’s ready for editing.
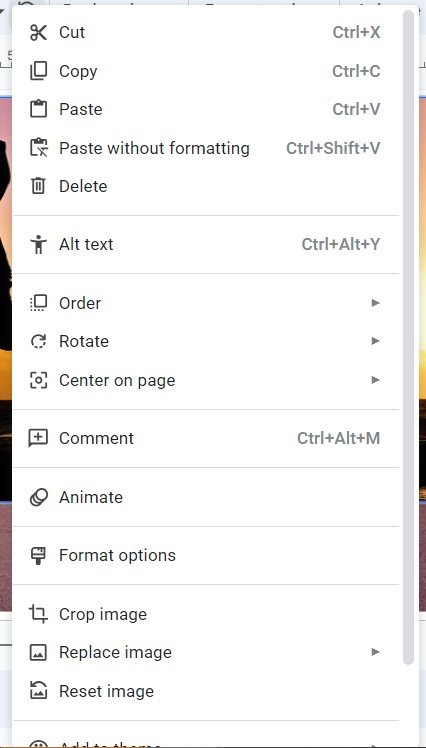
2. Right-Click the Selected Image to Open the Menu
With the image selected, right-click on it to bring up a menu of options. This menu contains the tools needed to adjust the image’s position on the slide.
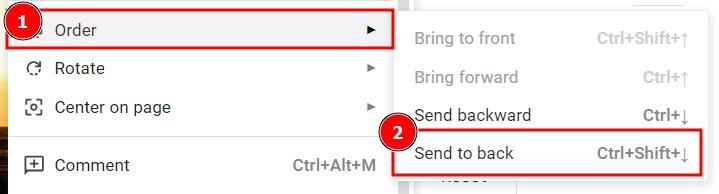
3. Hover Over Order in the Menu to Reveal Positioning Options
In the right-click menu, hover over the Order option. This will open another submenu that shows options for moving the image forward or backward.
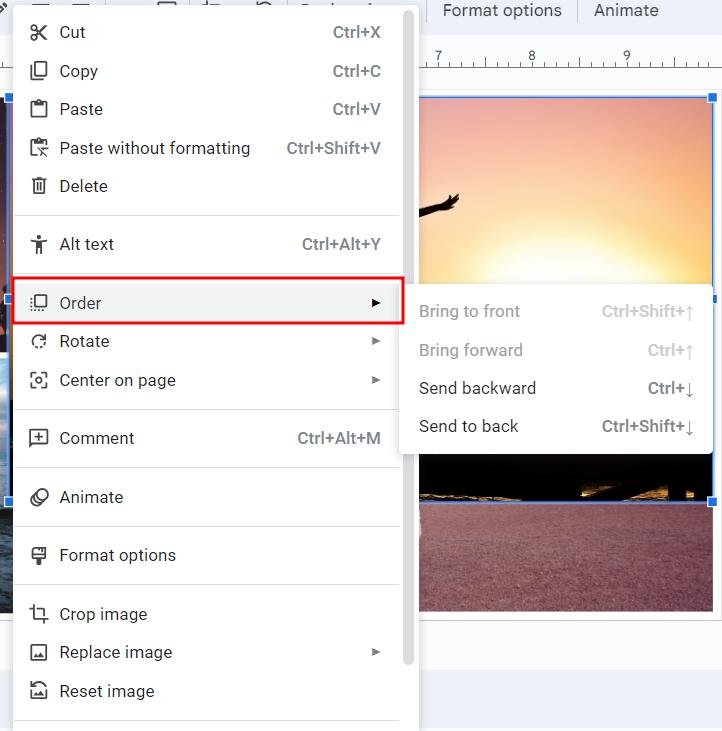
4. Click Send to Back to Move the Image Behind Other Objects
From the Order submenu, click Send to back. This will move the image behind all other objects on the slide. If you want to move it behind one object at a time, choose Send backward instead.
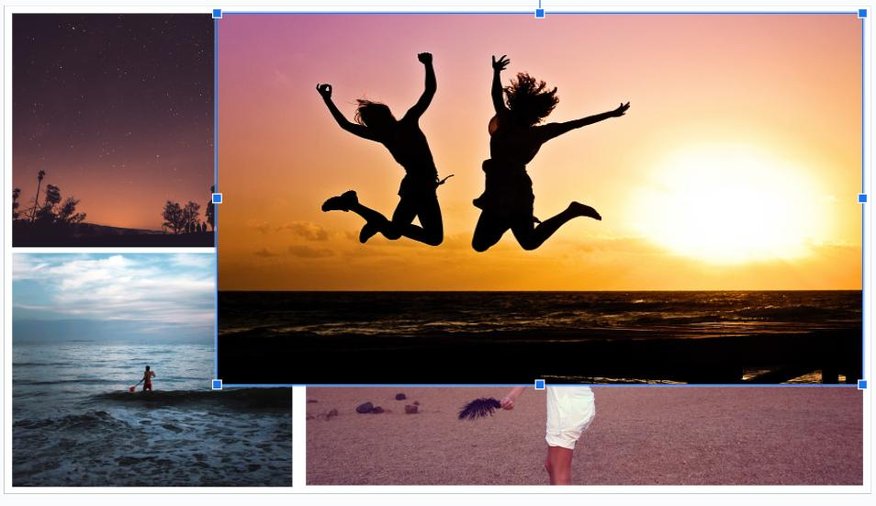
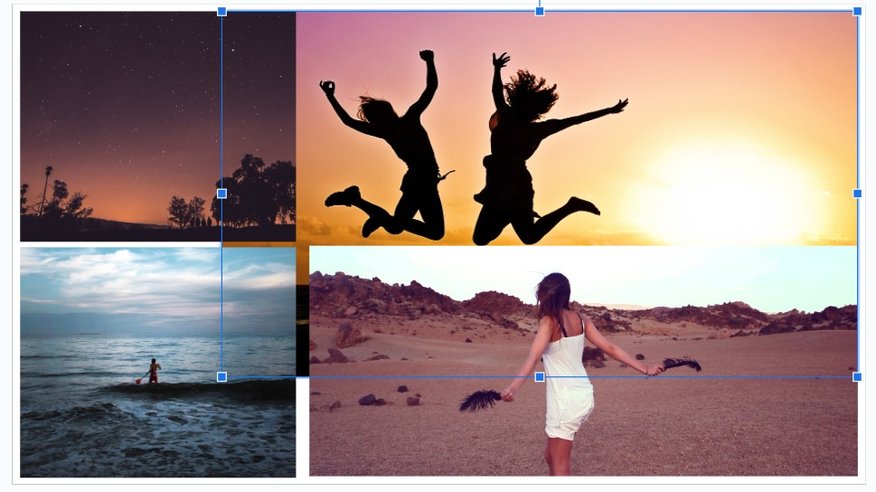
5. Confirm the Image Is Behind Other Objects on the Slide
Review your slide to ensure the image is now positioned behind the other objects. If needed, repeat the steps to make further adjustments.
We hope that you now have a better understanding of how to move an image back in Google Slides. If you enjoyed this article, you might also like our articles on how to change the shape of an image in Google Slides and how to insert a transparent image into Google Slides.