How to Put Google Slides on a Flash Drive (Easiest Way in 2025)
In this tutorial, we will show you exactly how to put a Google Slides file on a flash drive in just a few simple steps. Read on to learn more.
Add Google Slides to a Drive
Follow the steps below to save a Google Slides file in a flash drive.
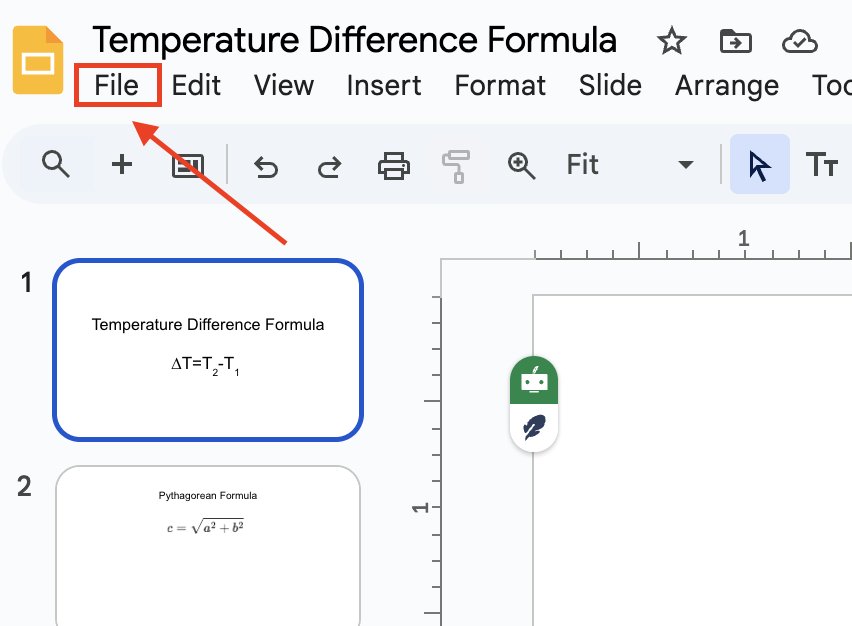
1. Open the File Menu in Google Slides
At the top of your Google Slides window, locate and click on the “File” option. This opens a dropdown menu with different actions you can take for your presentation.
2. Select “Download” from the Dropdown Menu
Hover over “Download” in the dropdown menu. A side menu will appear, showing different file formats that you can choose from.
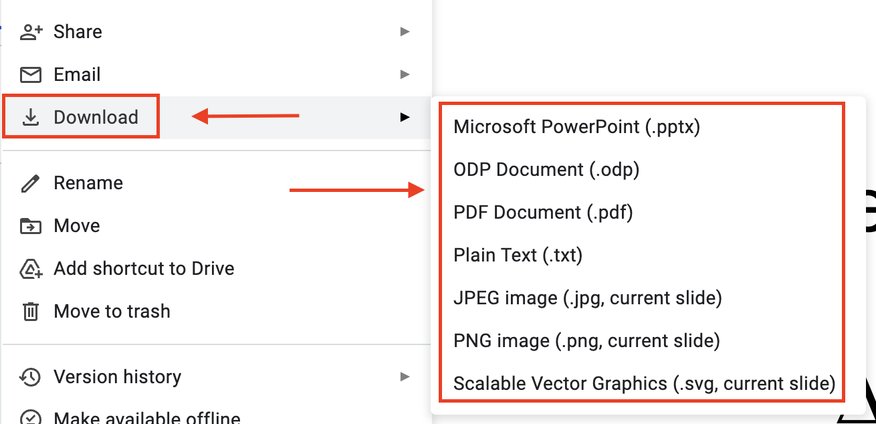
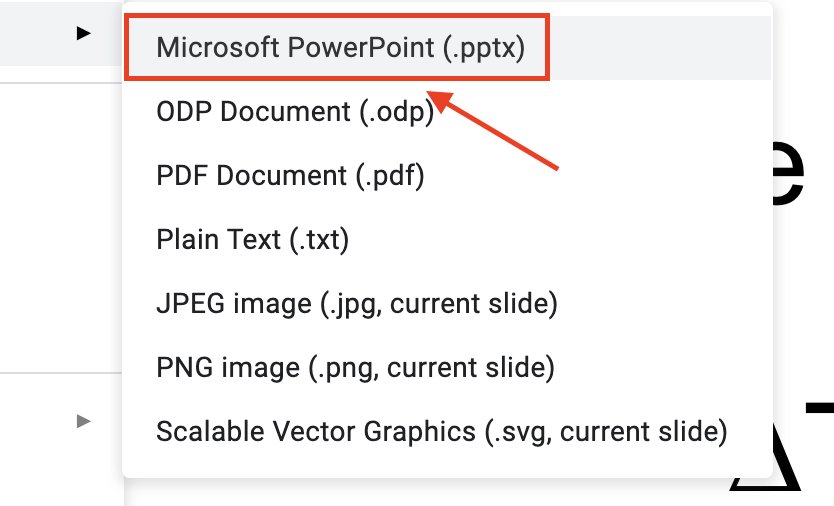
3. Choose the Best File Format for Your Needs
Select a format based on how you plan to use the file. If you want to edit it later, choose “Microsoft PowerPoint (.pptx).”
If you need a read-only version, select “PDF Document (.pdf).” Here, let’s choose “Microsoft Powerpoint (.pptx).”
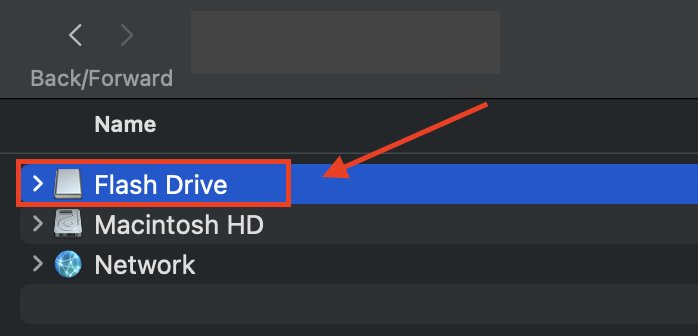
4. Open Your Flash Drive Folder (Ensure It Is Plugged In)
Make sure your flash drive is inserted into a USB port on your computer. Then, open “File Explorer” (Windows) or “Finder” (Mac).

Look for your flash drive under “This PC” (Windows) or “Locations” (Mac). Click to open it.
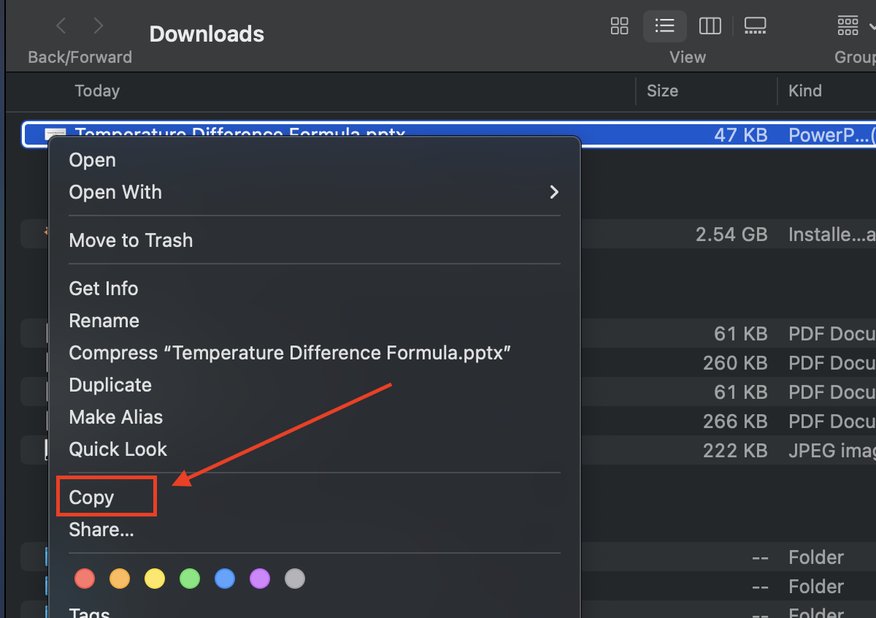
5. Copy the Downloaded File and Paste It Into the Flash Drive
Locate the file you downloaded earlier. Right-click on it and select “Copy.”
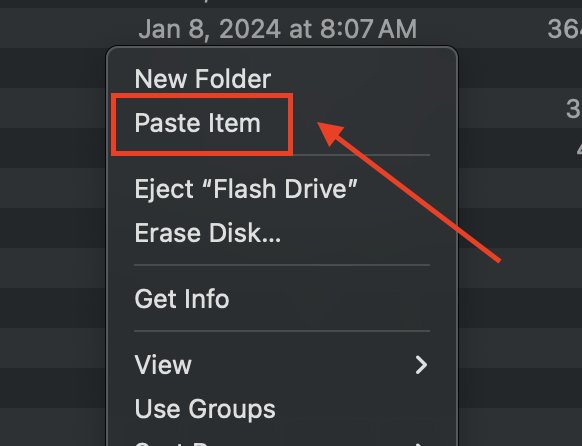
Navigate to your flash drive folder, right-click in an empty space, and select “Paste Item.”
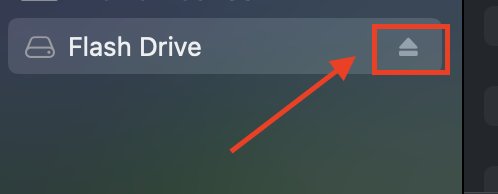
6. Eject the Flash Drive to Prevent File Corruption
Before unplugging, properly eject your flash drive. On Windows, right-click the flash drive in “File Explorer” and select “Eject.” On Mac, click the eject icon next to the drive in “Finder.”
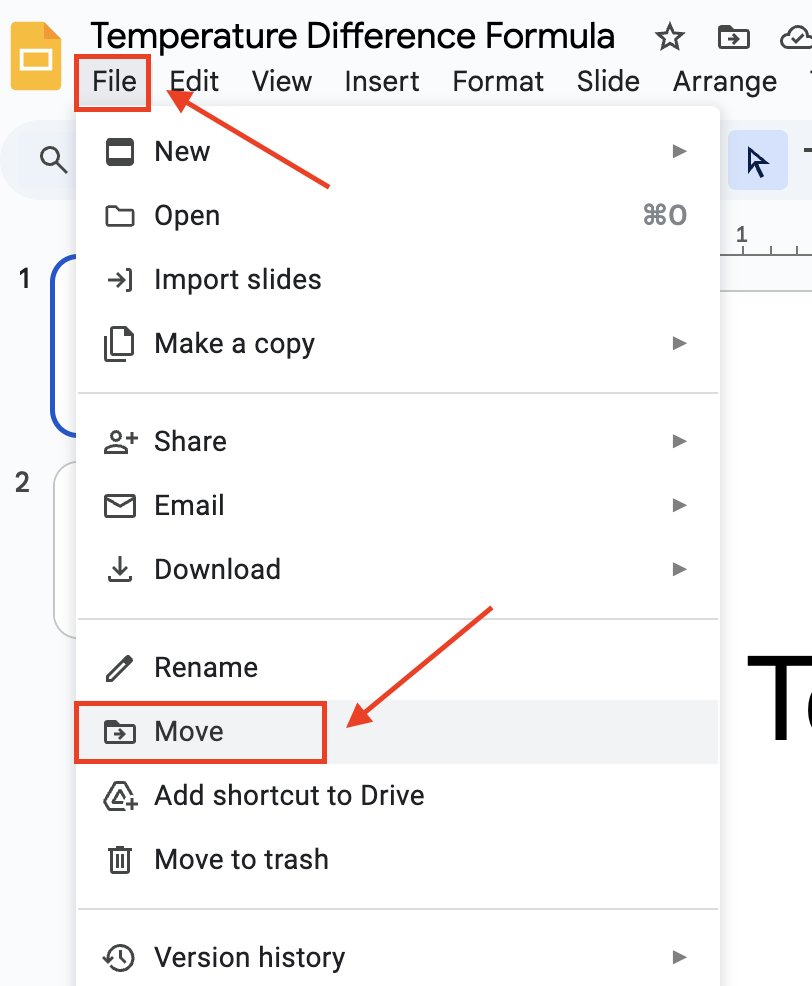
7. Save the File to Google Drive Instead of a Flash Drive
If you don’t have a flash drive or prefer cloud storage, you can save the file directly to a specific Google Drive folder. Instead of downloading, click “File,” then “Move,” and choose a folder in your Google Drive.
This allows you to access the file from any device with an internet connection.
We hope that you now have a better understanding of how to save a Google Slides presentation on a flash drive. If you enjoyed this article, you might want to check our articles on how to use the Google Slides formula and how to make a graph in Google Slides.